
Got some old recordings on vinyl you would like to listen to or digitize at home?
If so, you'll want to check out this portable record player! Available for check out at Arapahoe Libraries!
(NOTE: SD card or USB flash drive not included)
How does it work?
How does it work, you ask? Well, let's take a look.
- First, let's look at the function and controls.
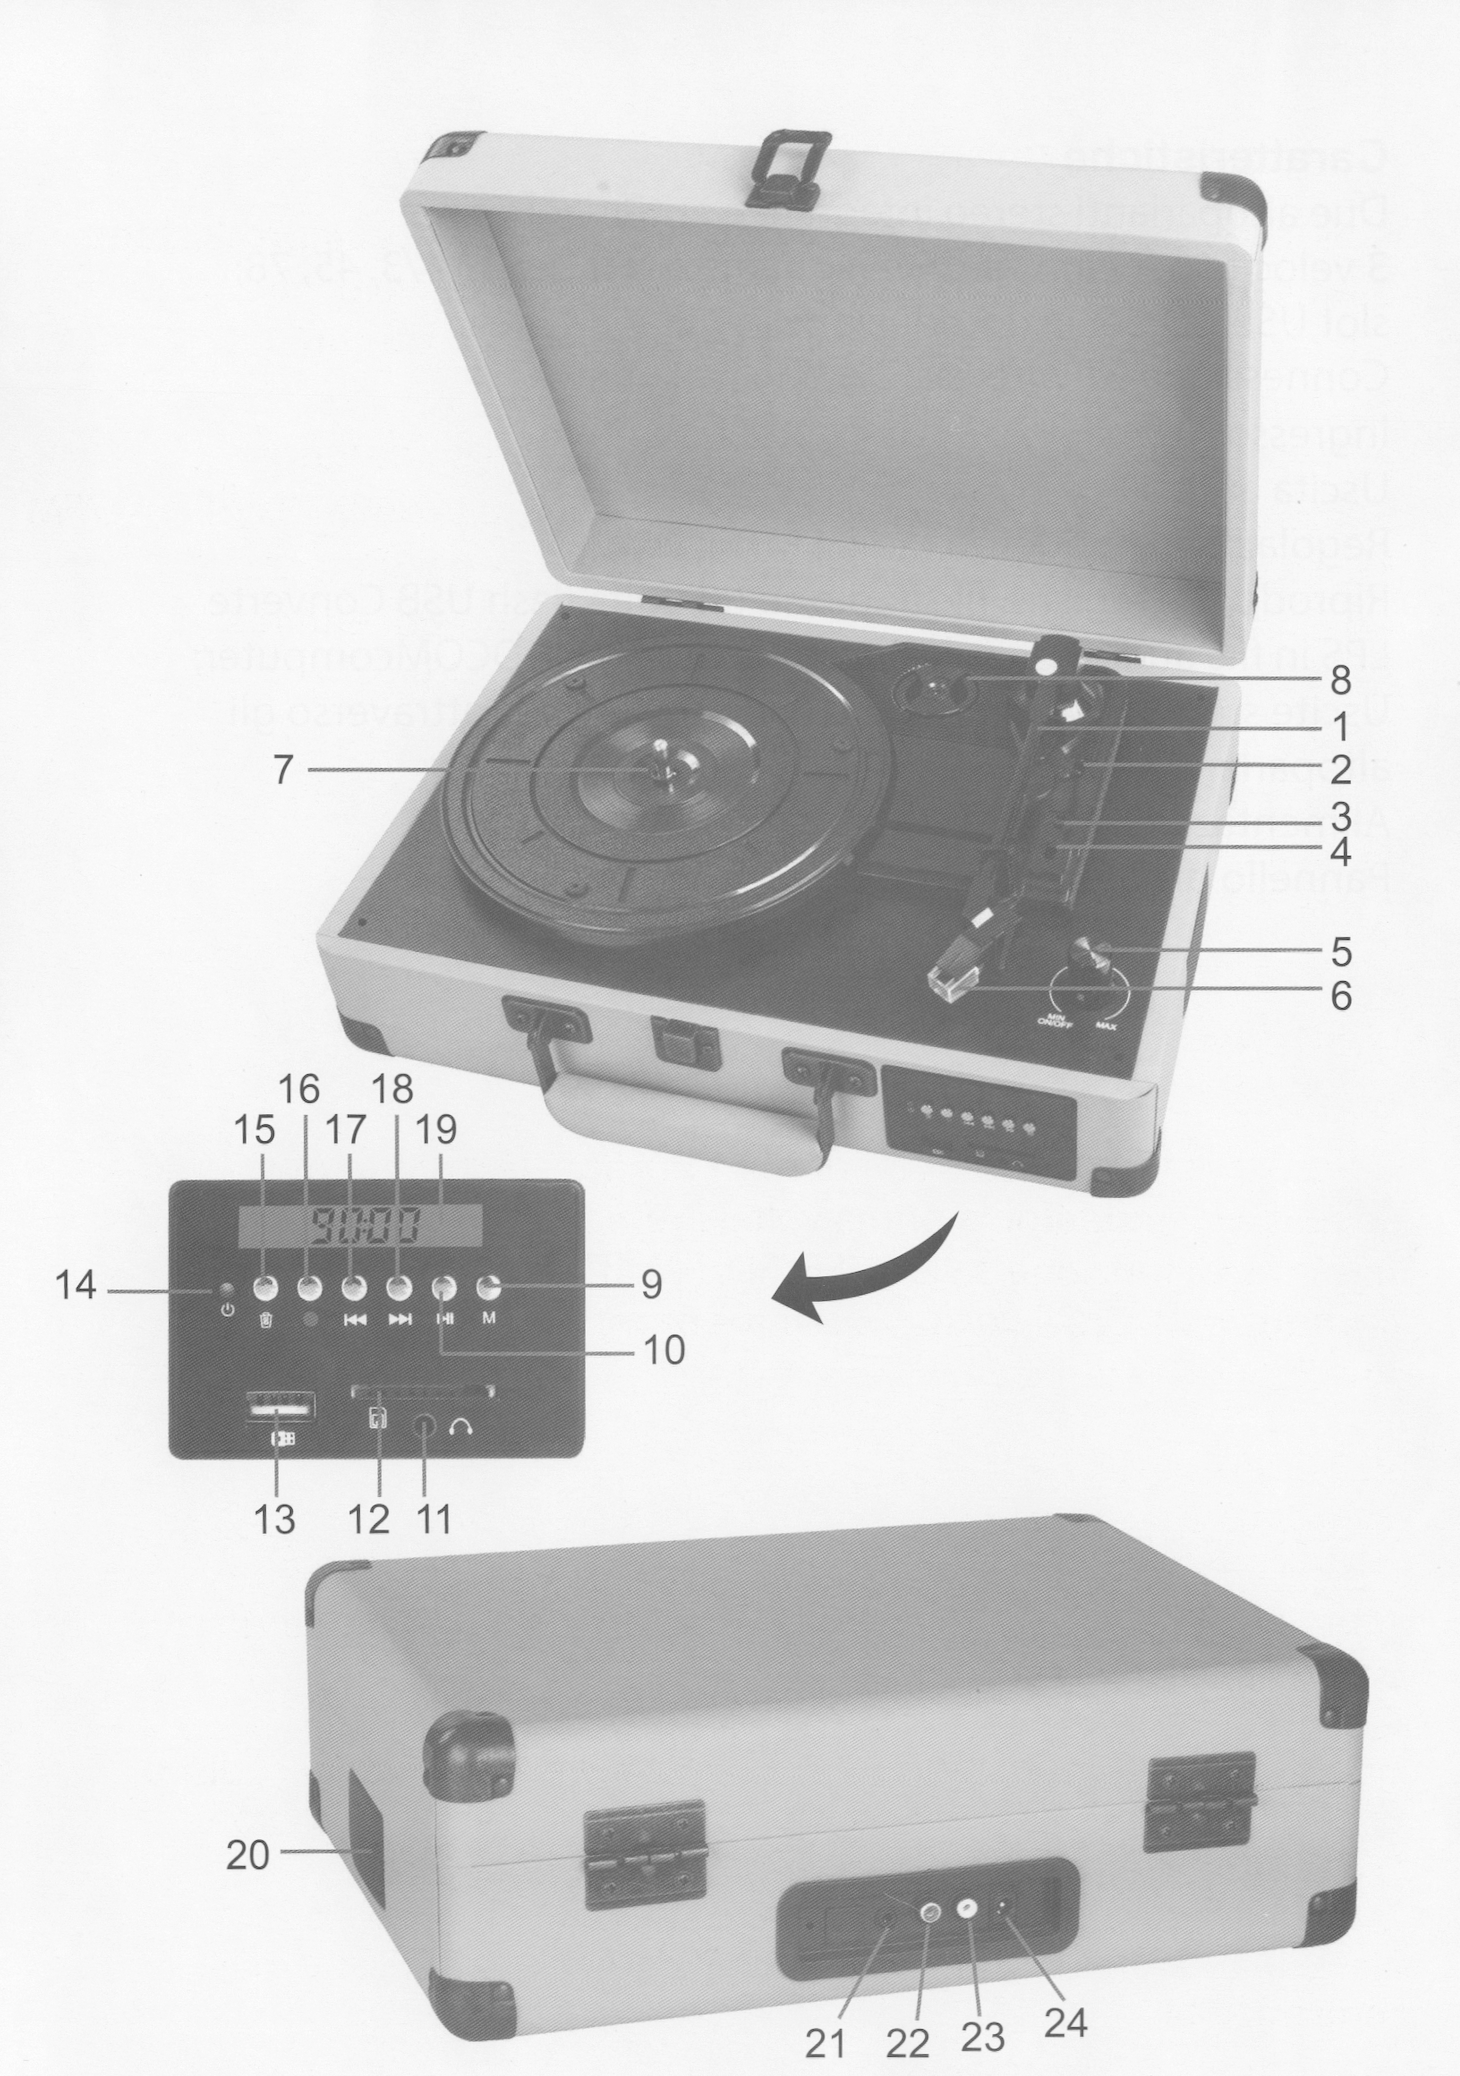
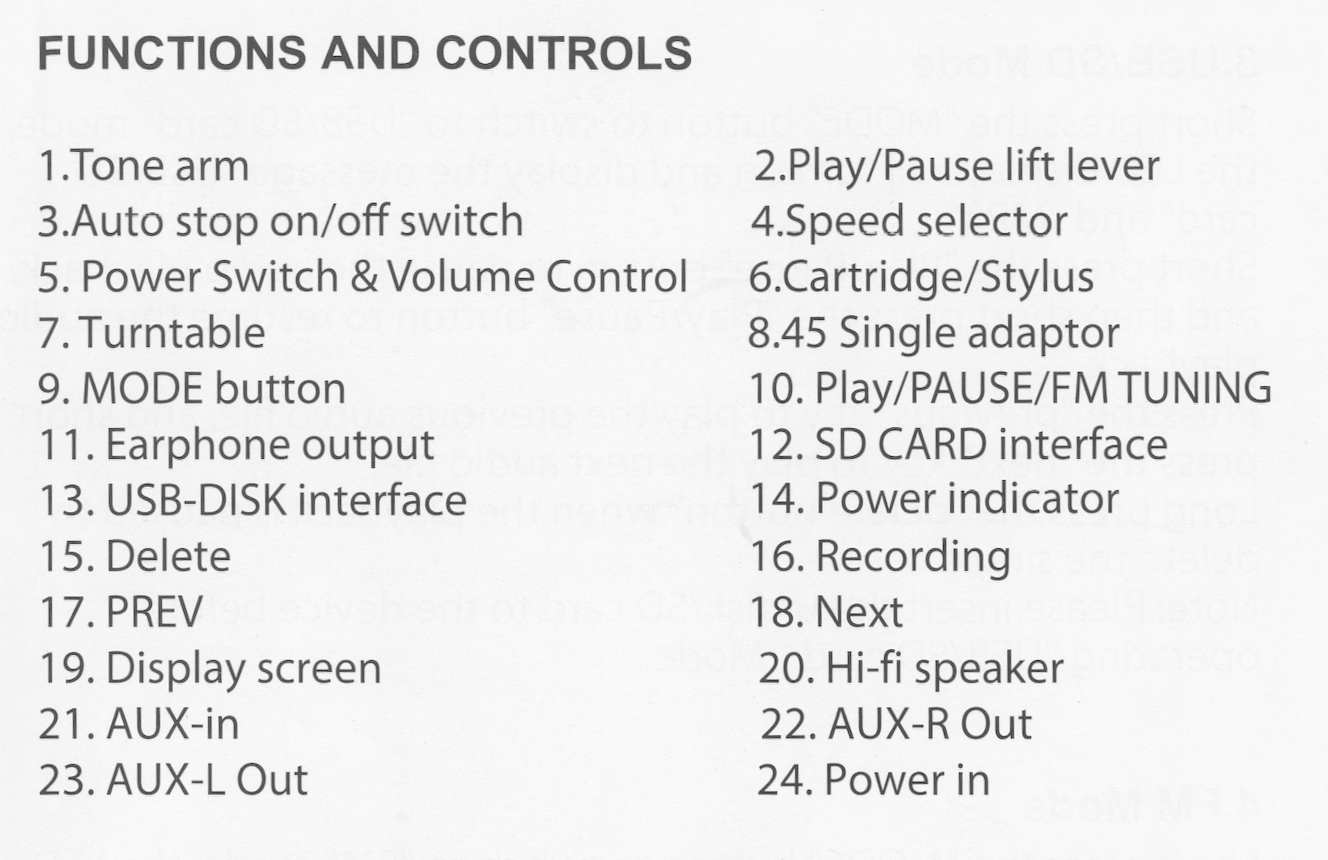
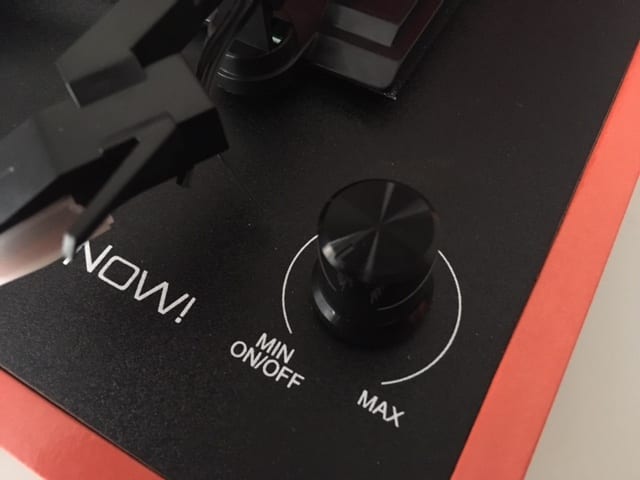
2. Now, let's power up. Plug the power cord into the back of the record player and the other end into a standard wall socket. Now, let's power on. Turn the volume knob (5) in the bottom right corner on the top of the record player, clockwise.
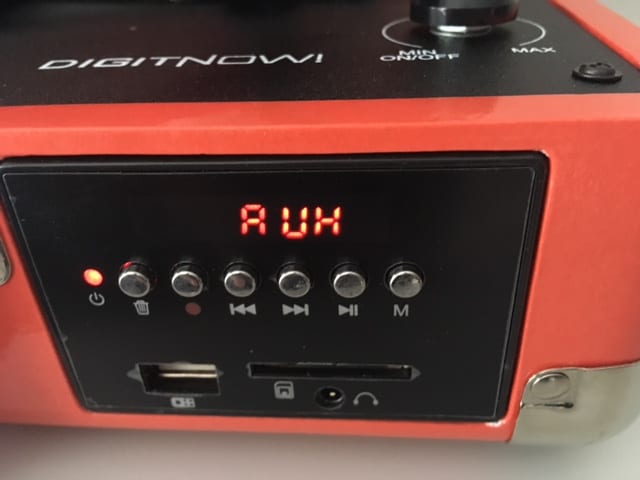
3. Note the small screen on the front of the record player (shown below). The record player defaults to LP when turned on. If you plan to listen to a record or digitize a record, leave the setting as is.
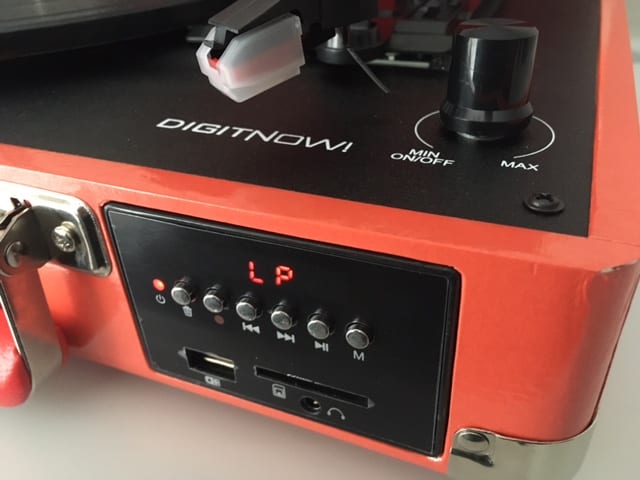
4. If you want to listen to a local radio station push the MODE button. That's the button above the M. To find local channels hold down the PLAY/PAUSE button and the record player will scan for local stations and save them by itself. Once the record player completes the scan you can use the FORWARD and REVERSE buttons to change the channel.

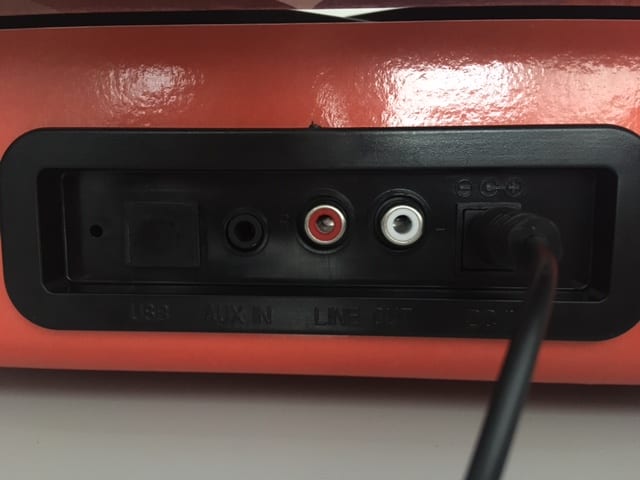
5. If you want to connect the record player to your Hi-Fi home entertainment stereo system, use the AUX setting by clicking again on the MODE button. You will also need to connect the unit to your system using the RCA audio cables provided. One end will attach to the record player RCA line-out ports (red and white ports in image below right) and the other end to the auxiliary or "phono" line-in ports on your stereo system (typically also red and white). NOTE: Be sure your stereo selection is set to "phono" or "auxiliary." The ports on the back of the record player can also be directly connected to external speakers.
6. Playing and digitizing vinyl.
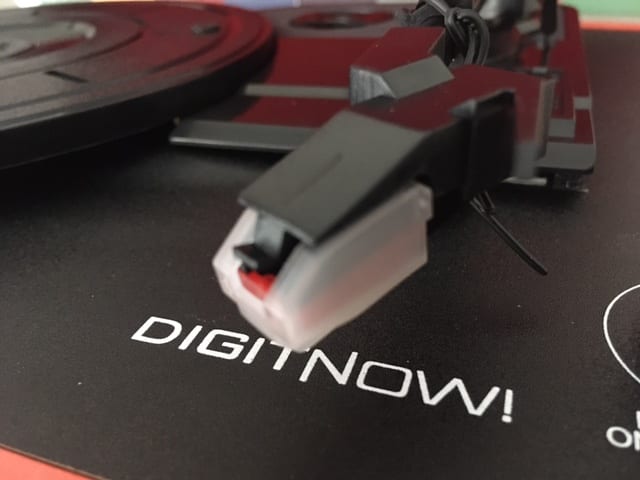
7. To play your vinyl remove the translucent plastic sleeve covering the needle (6). Gently pull forward and the sleeve will slide off. NOTE: When you have finished your project remember to slide the sleeve back on.
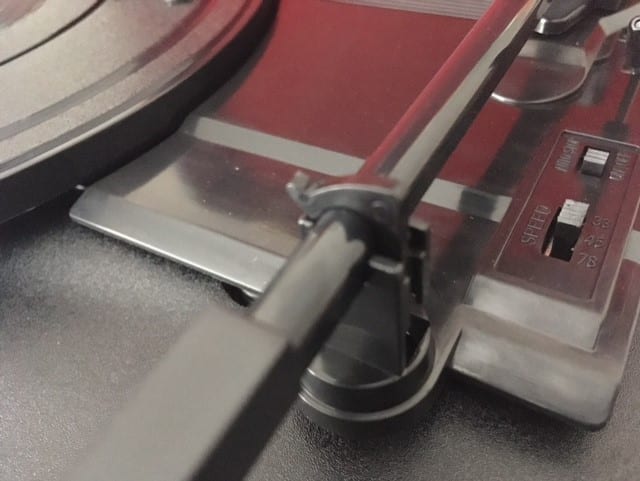
8. Release the tone arm (1) by gently pulling back the plastic latch holding it in place (shown below).
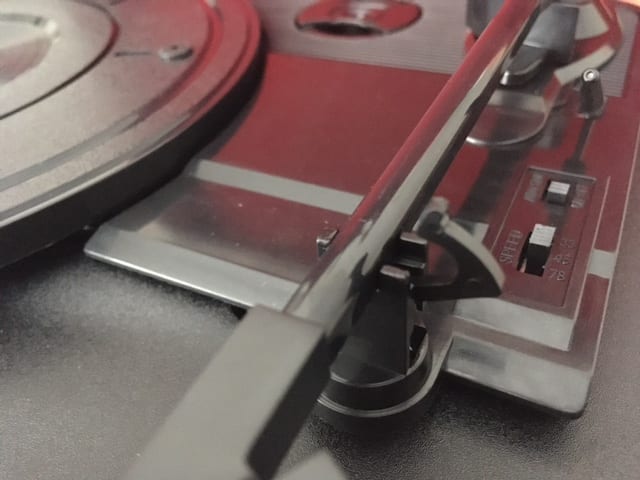
9. Place your record on the record player and then place the needle of the record and enjoy!
10. To digitize your vinyl follow steps 8 and 9.
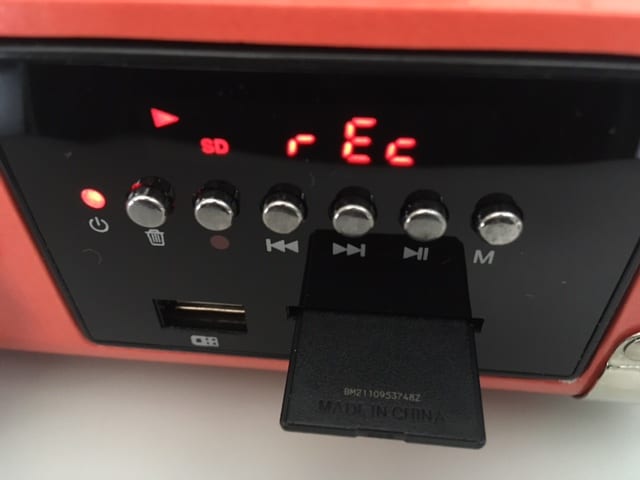
11. Insert your SD card or USB flash drive in the slot on the front of the record player. NOTE: SD cards go in label side down and do not click in.
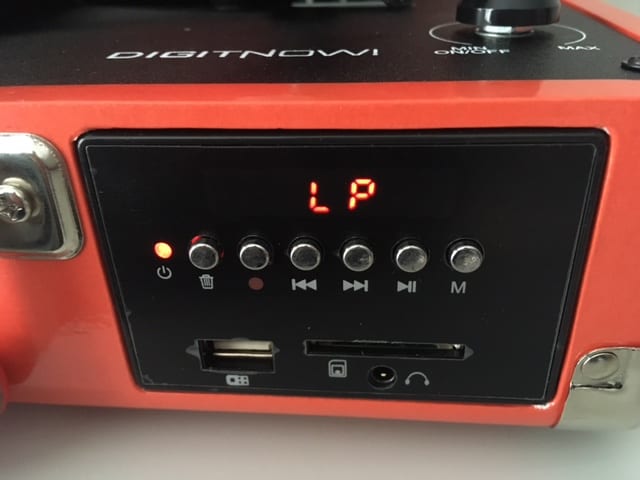
12. With the SD card or USB flash drive inserted you are now ready to record your vinyl (we are using an SD card). Push the RECORD button (that's the second silver button from the left). The screen will show rEc. Place the needle on the record. The audio is now being recorded!
13. When Side A of the record has stopped, just turn the record over, put the needle down, and let Side B play out.
14. To stop recording vinyl just press the RECORD button again. The music is now on your SD card (or USB flash drive) as an mp3 file.
15. You can now remove your SD card or USB flash drive.
That's it! You're done!
Tips and Tricks
- The suitcase record player will also play the music files you have on your SD card or flash drive, even those you just digitized! With your SD card or flash drive in the USB or SD card port on the front of the record player, press the MODE button. The screen will show LOD and then the first track on your storage device will start to play. Use the forward button to go to the next track and the rewind button to go to the previous track.
Additional Information
Introducing DIGITNOW M46 Turntable Suitcase! , opens a new window


Add a comment to: Portable Vinyl Record Player