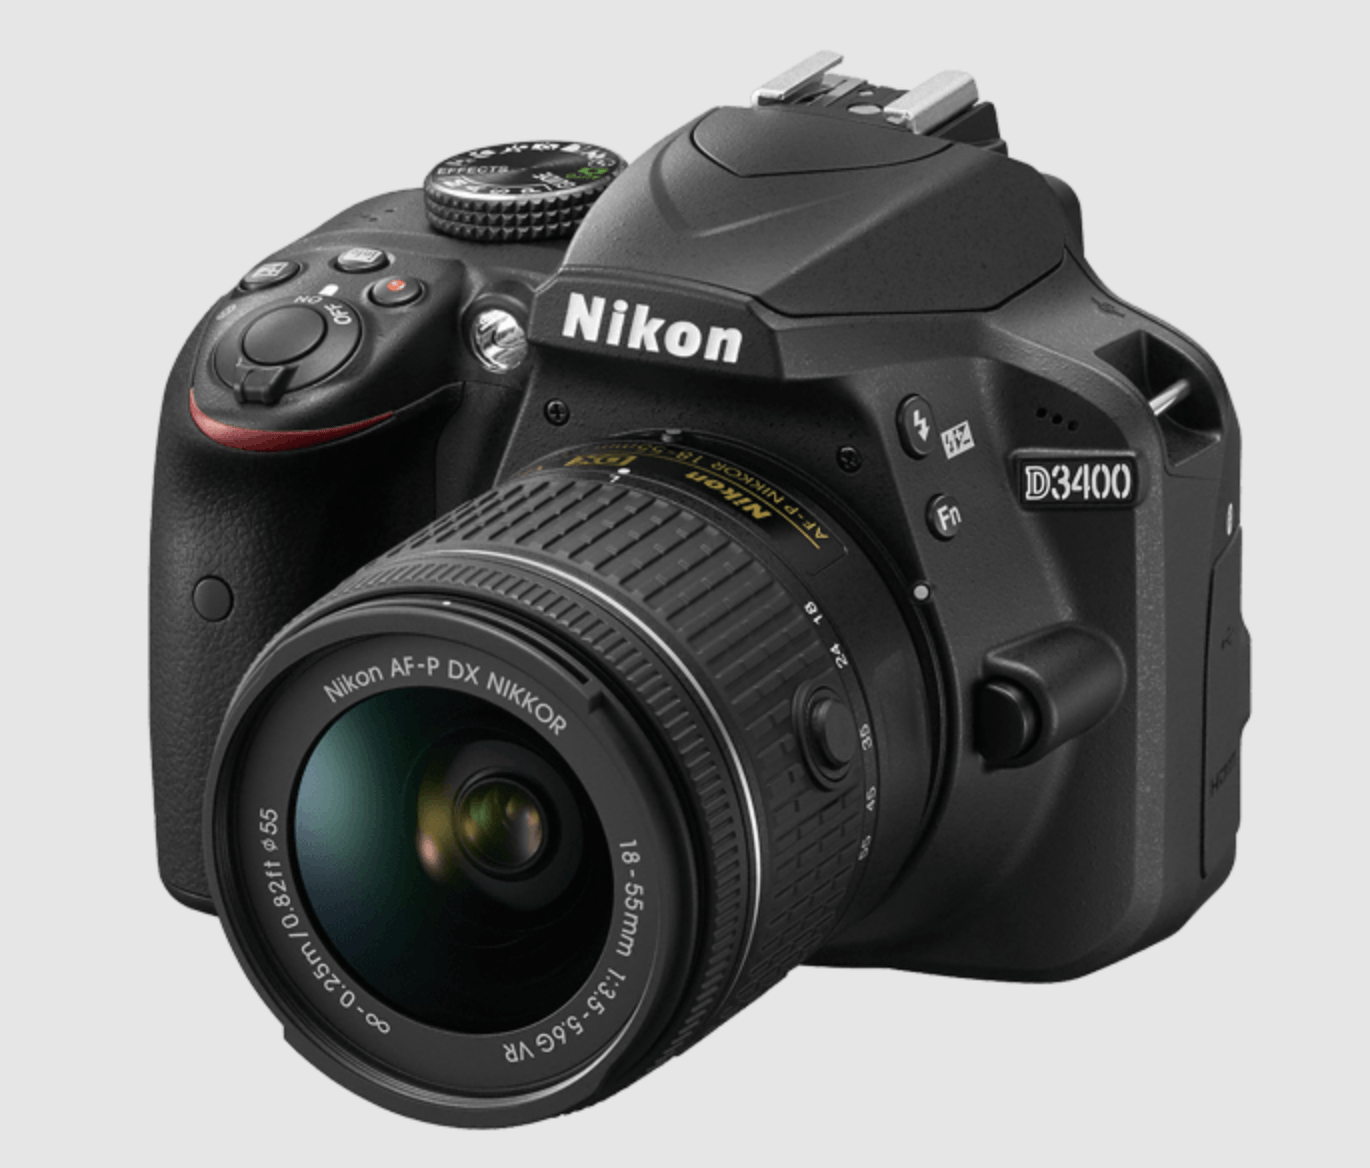
The Nikon D3400 is a great entry-level camera with plenty of features.
Place your hold today!
How to use the Nikon D3400
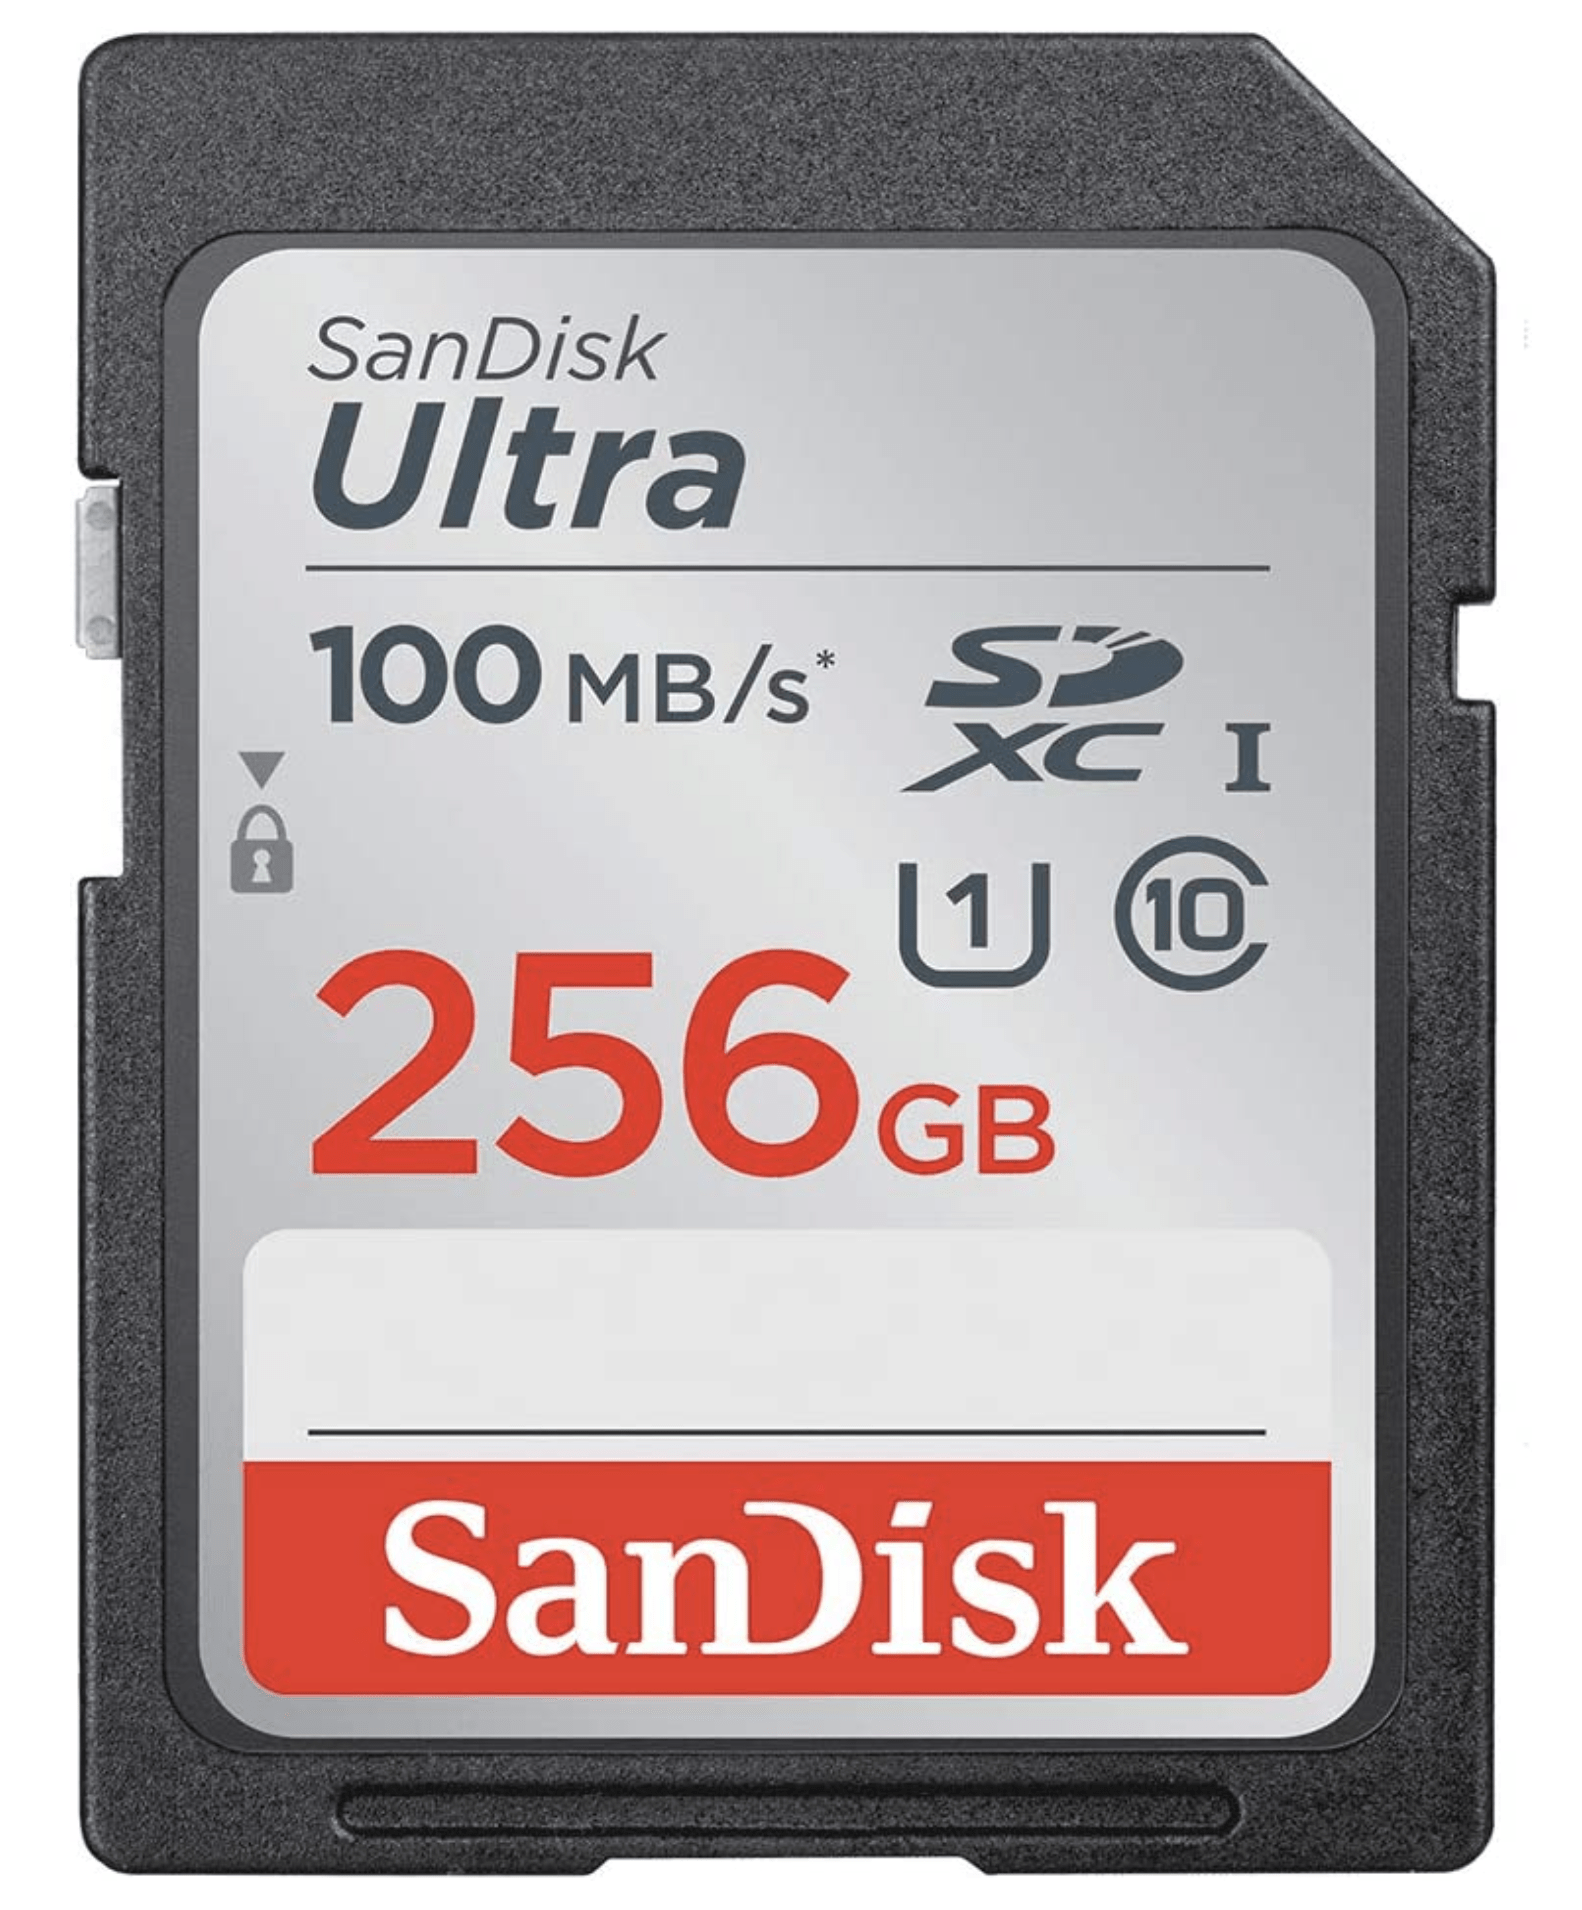
1. First and most important! The Nikon D3400 does not come with an SD card. You will need to supply your own. Sizes can range from 32GB to 256GB.
2. Putting your SD card into the camera. Open the SD card compartment. If you’re pointing the camera as if to take a photo, it’s on the right side at the bottom.
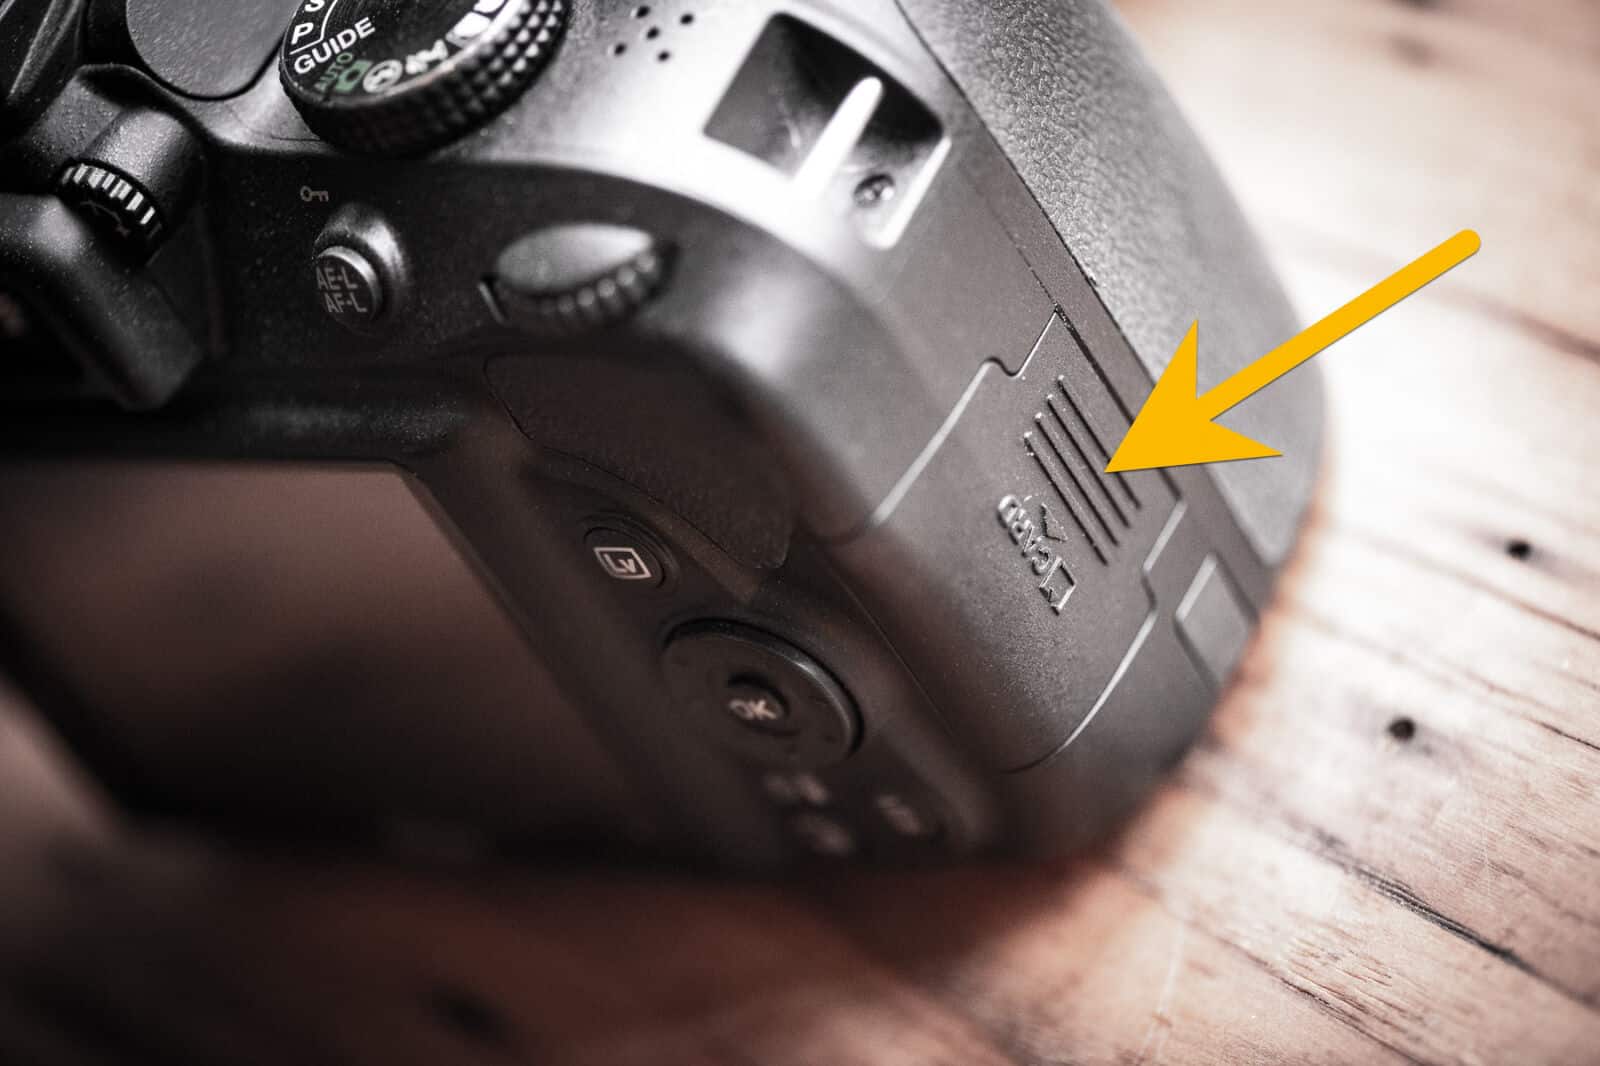
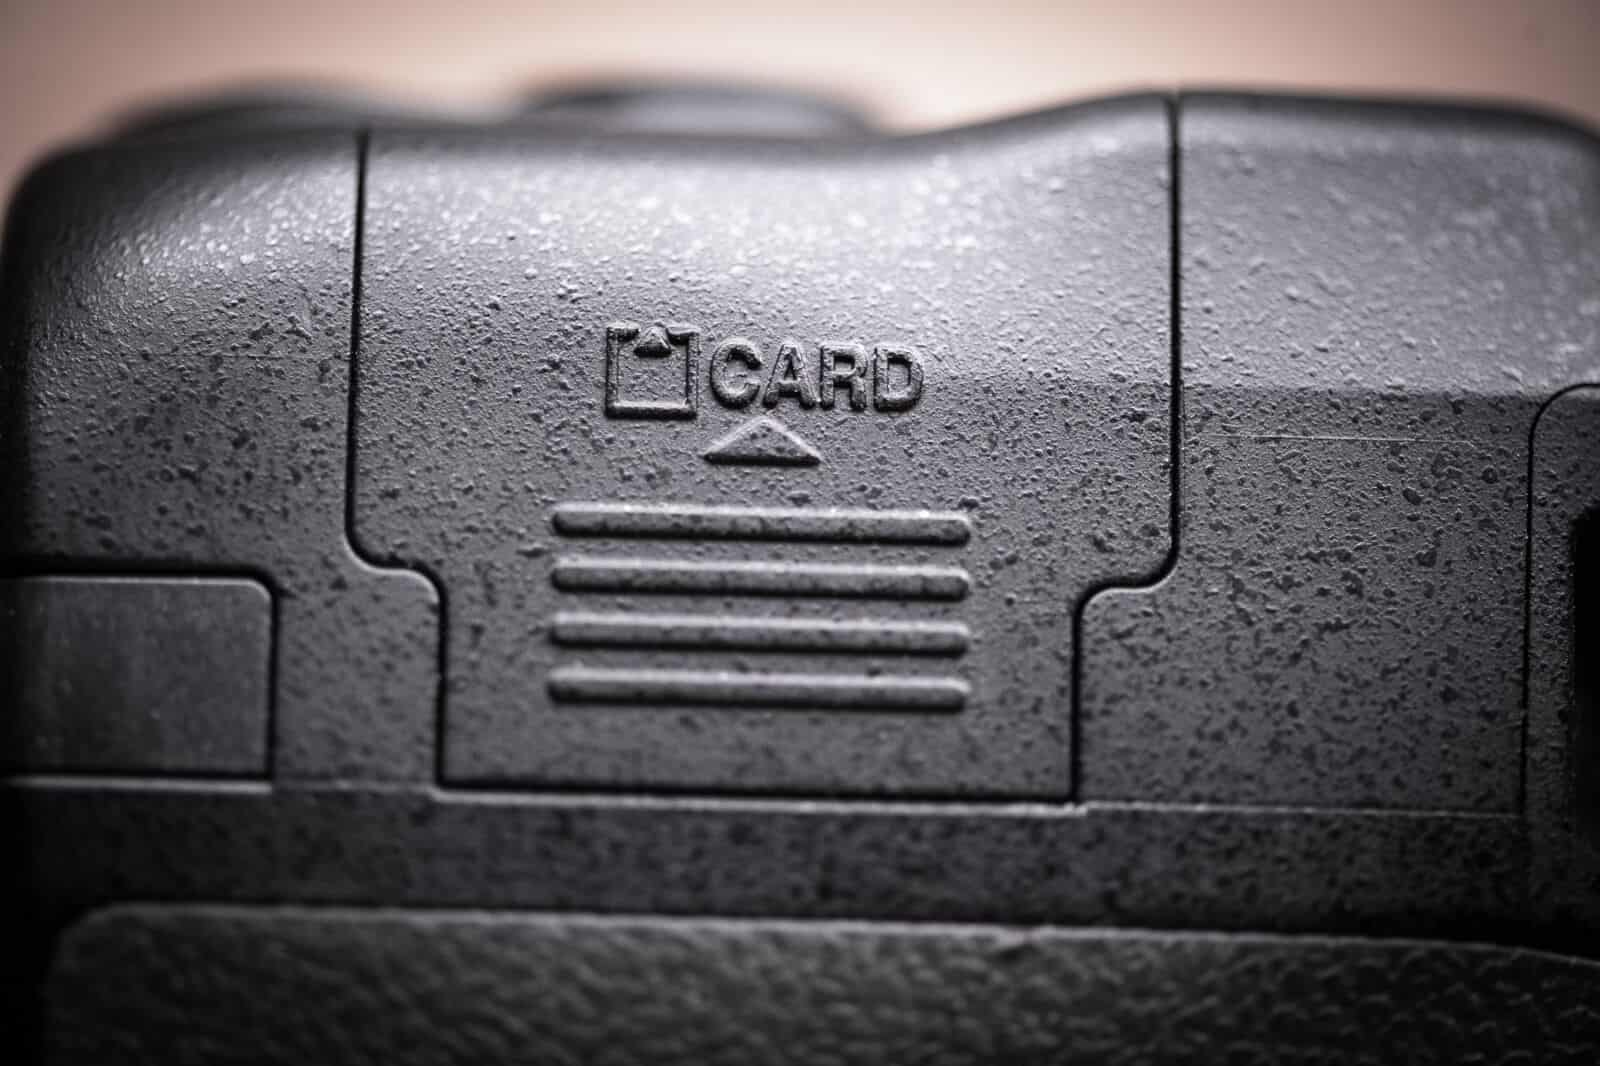
3. Gently slide the cover in the direction of the arrow that’s marked on the door.
4. The door is spring-loaded and will pop open. Don’t force it–it’s not very strong.
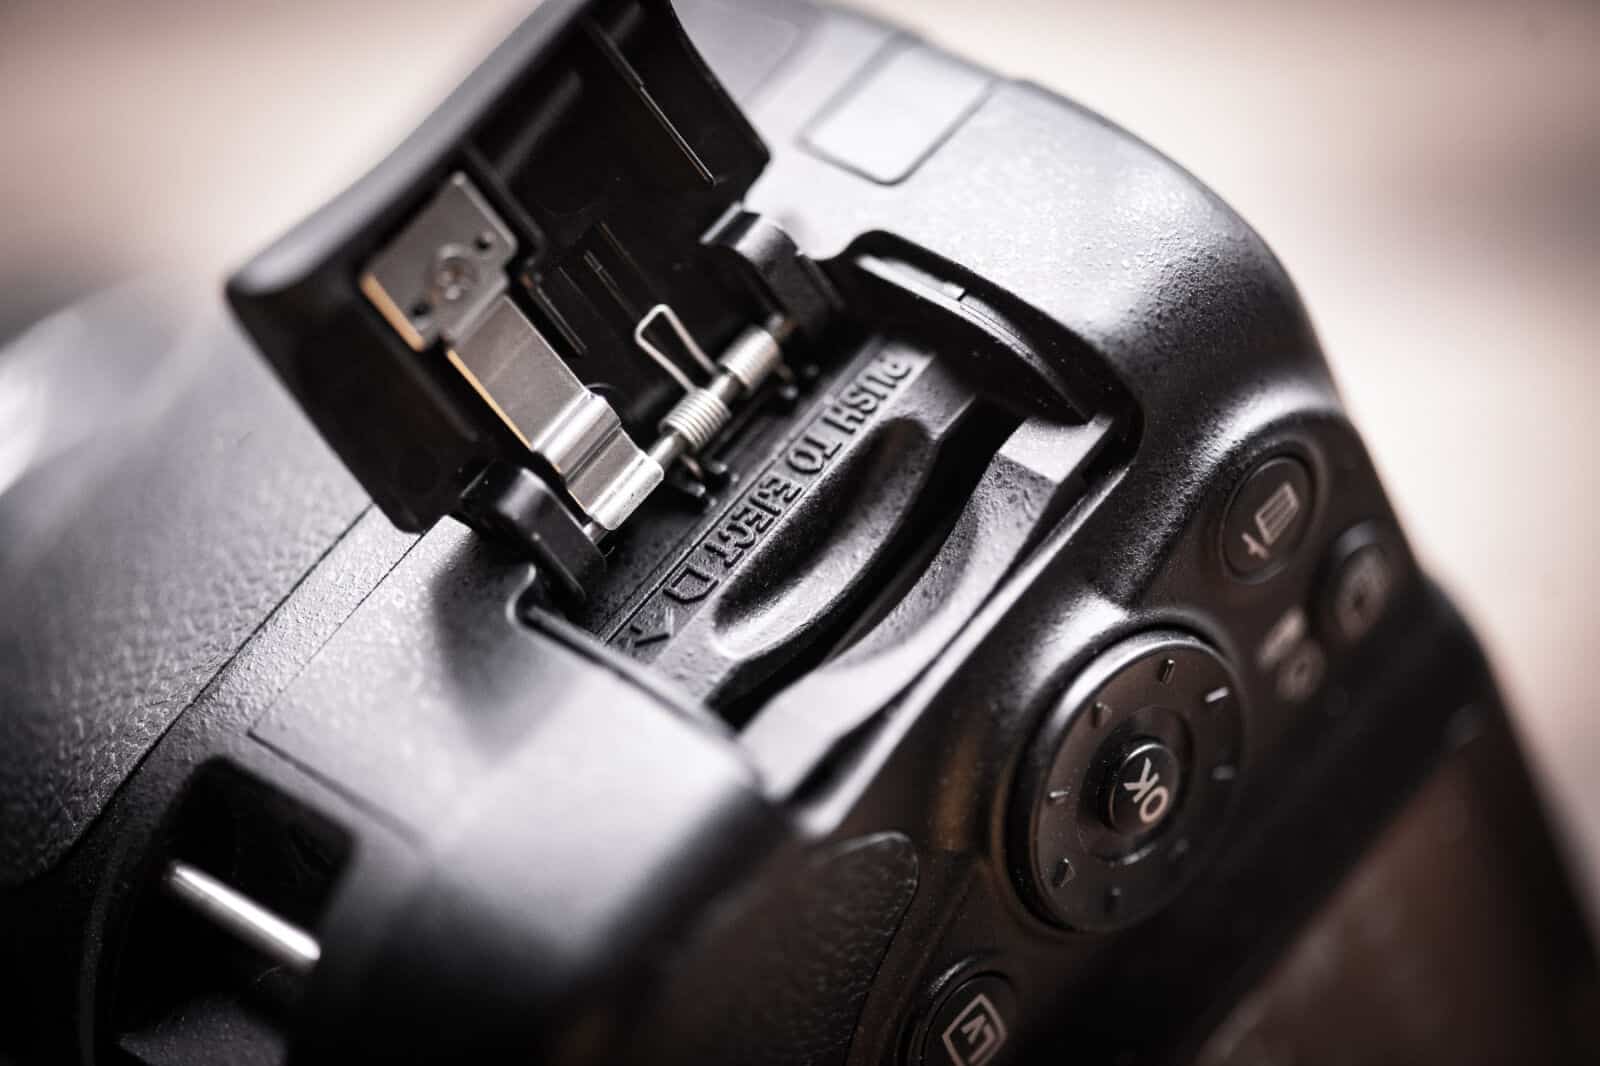
5. Slide the memory card into the slot. The side of the SD card with the label should face the front of the camera. The side with the metal contact points should be facing forward in the direction of the lens.
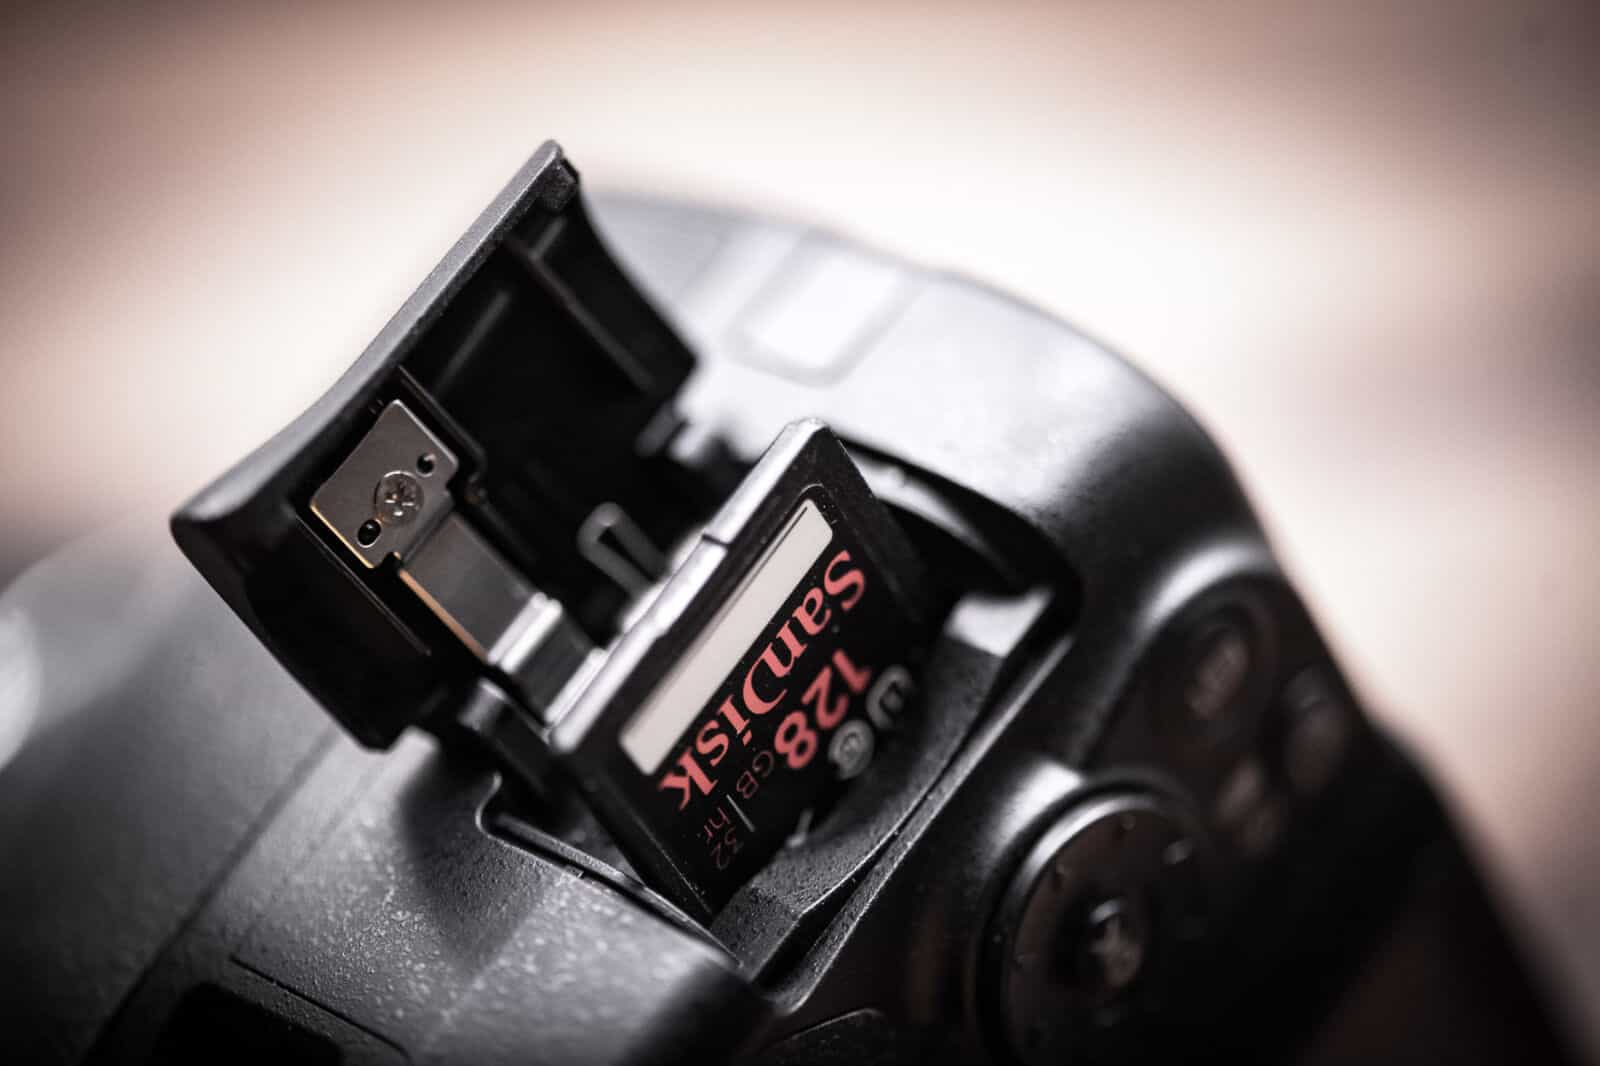
6. Gently push the card down into the camera until it clicks into place. It should stay in place flush with the slot. Don’t force it. If it doesn’t go down easily, the first thing to check is that the card is the right way around.
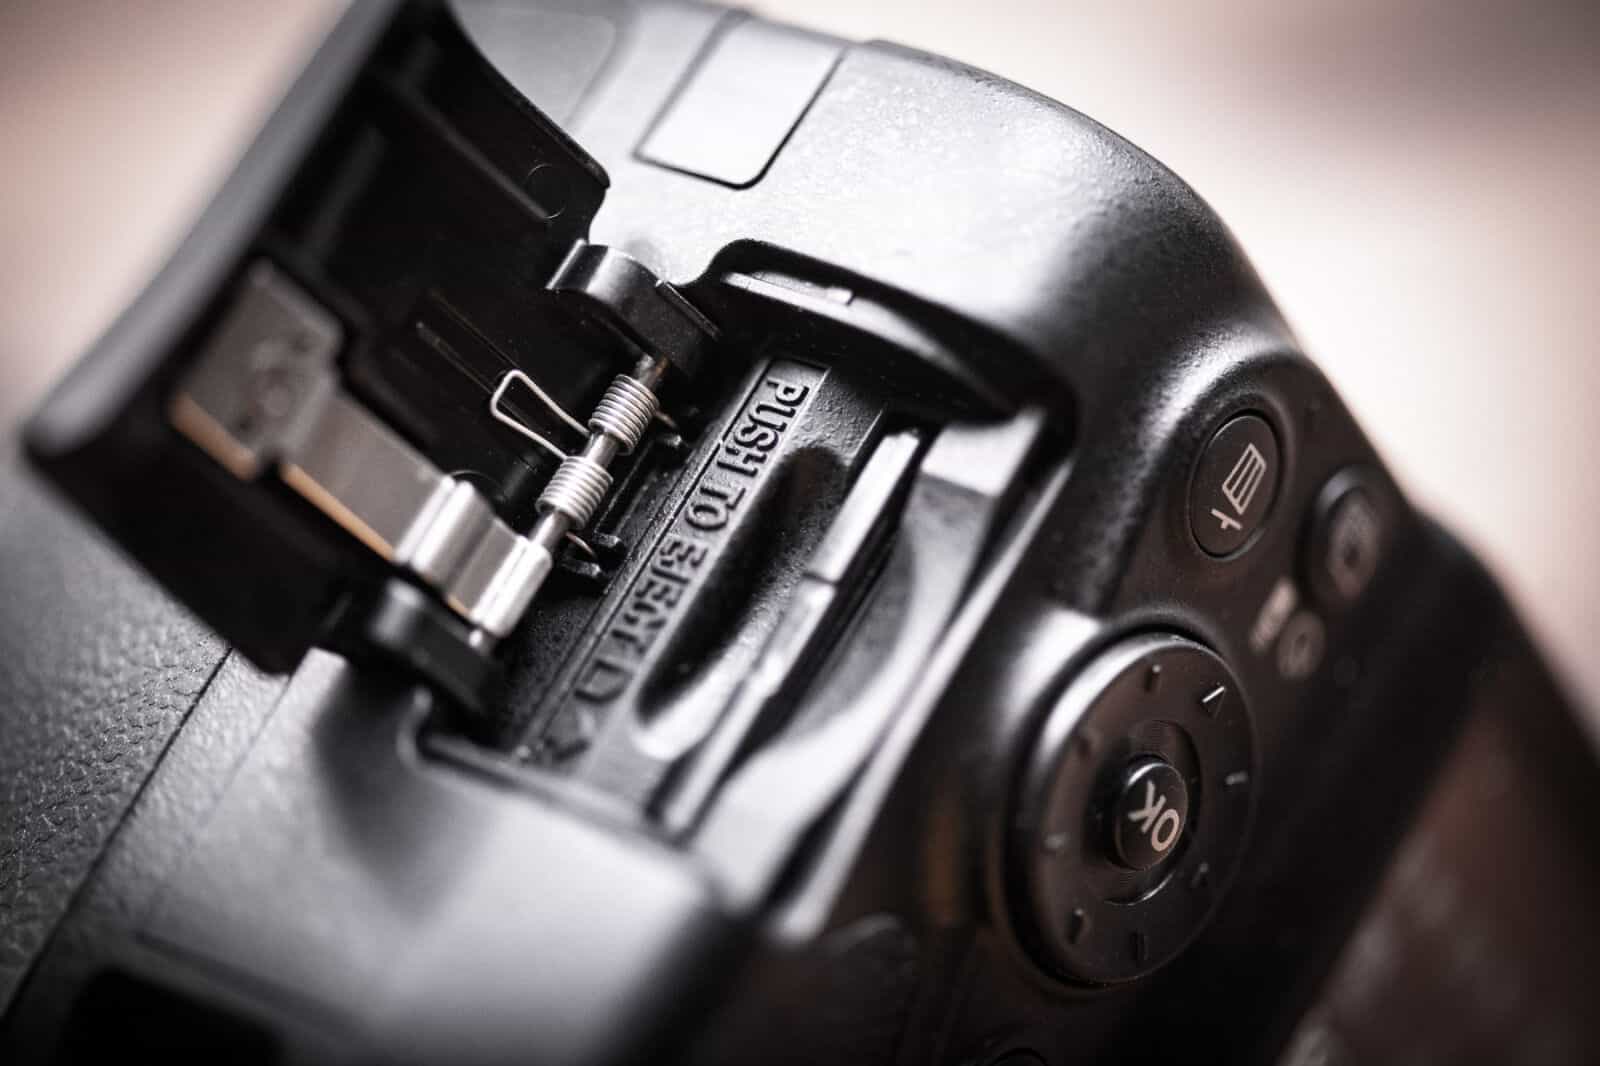
7. Close the SD compartment door by folding it down and gently sliding it back into place.
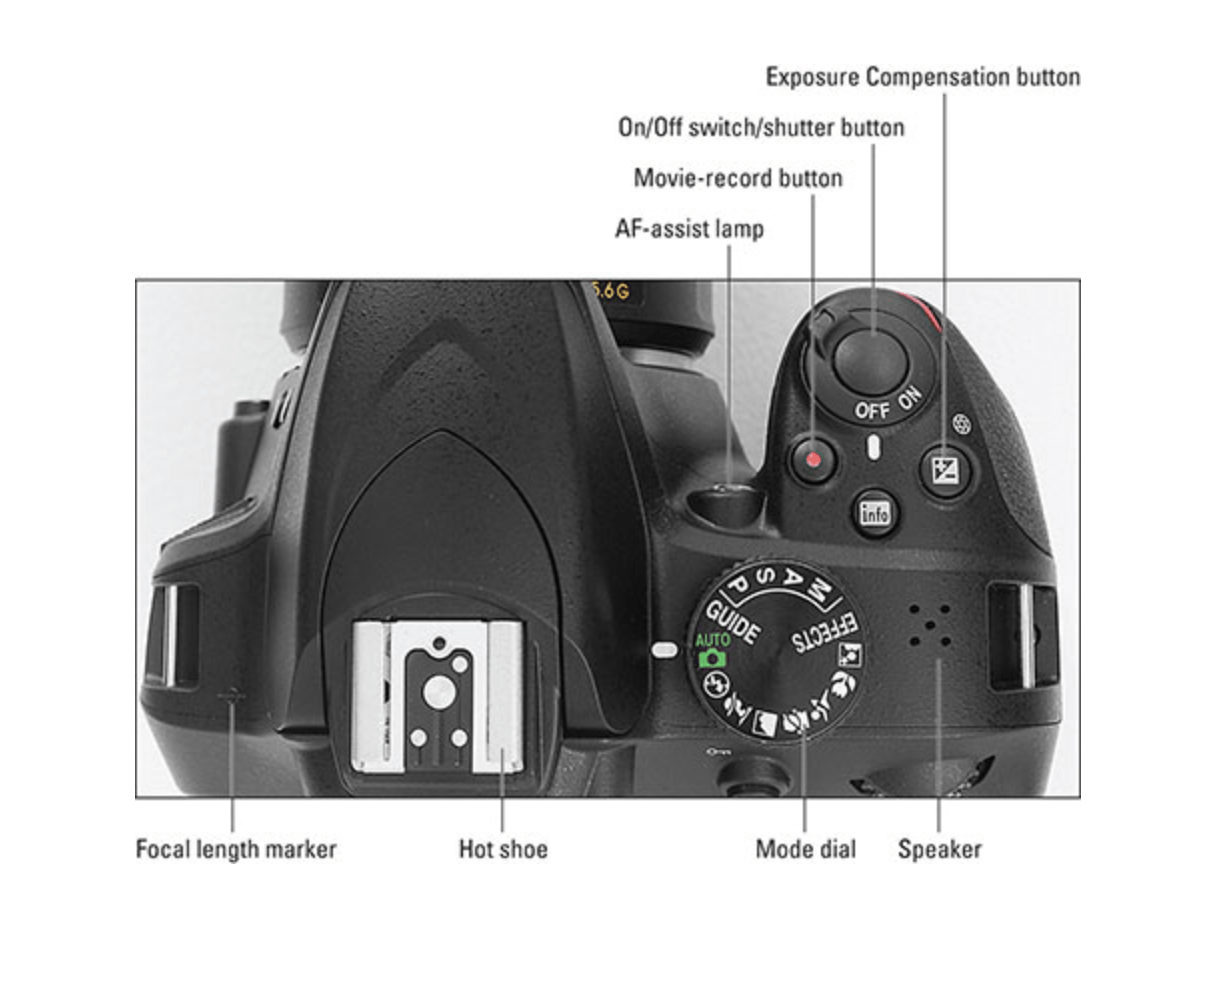
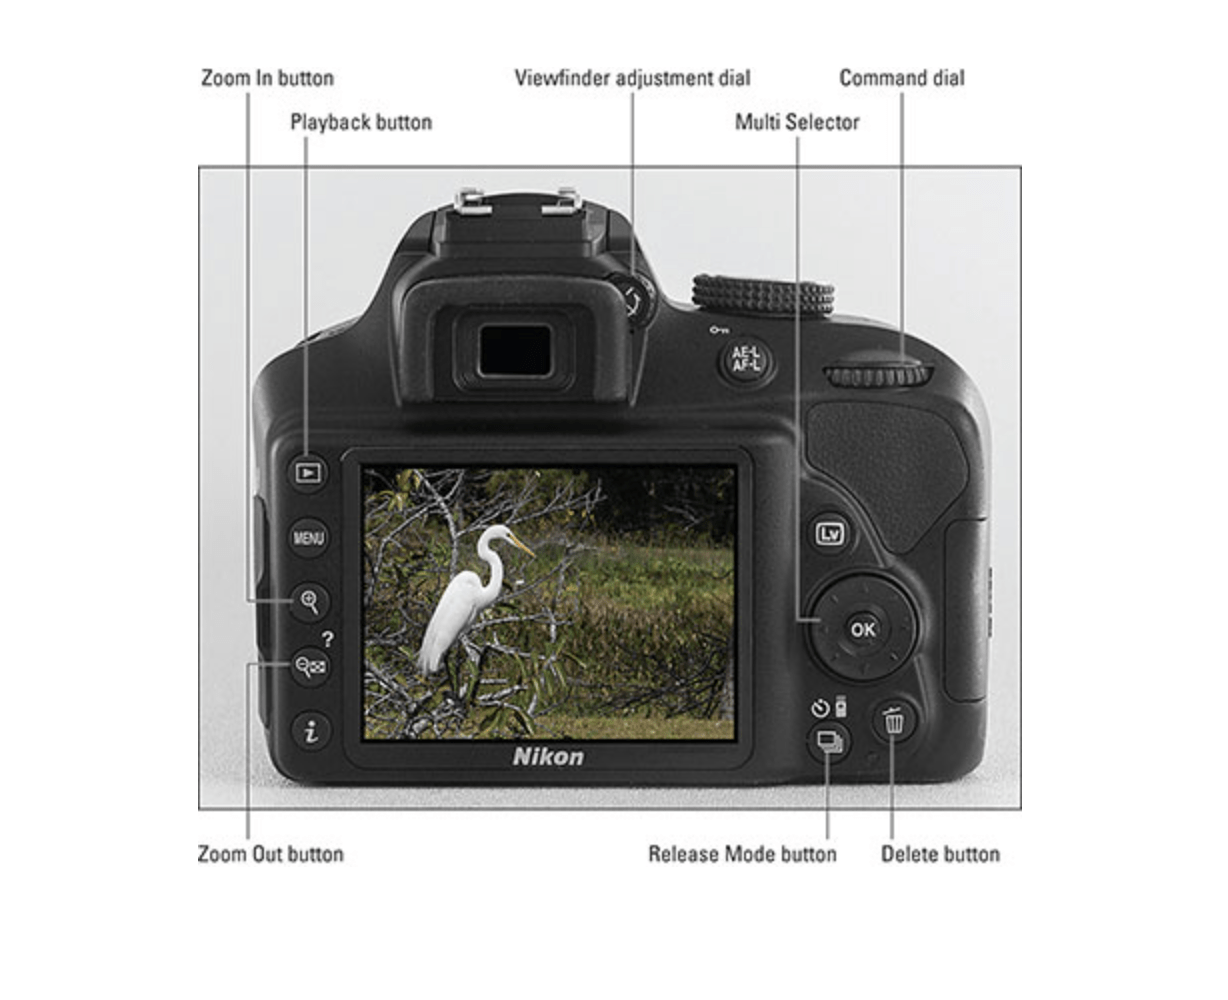
8. Now let's take a look at the external functions of the Nikon D3400.
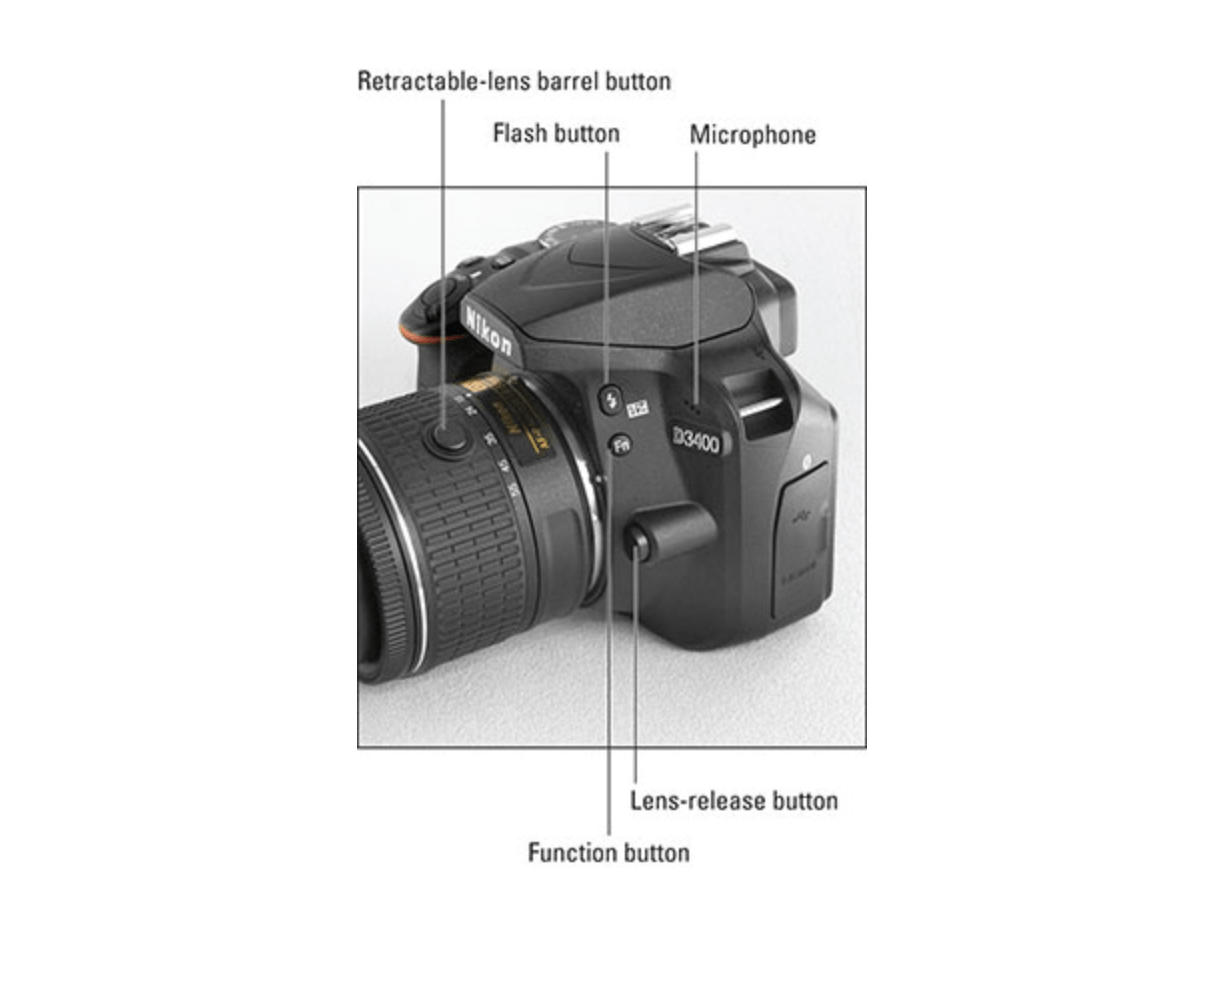
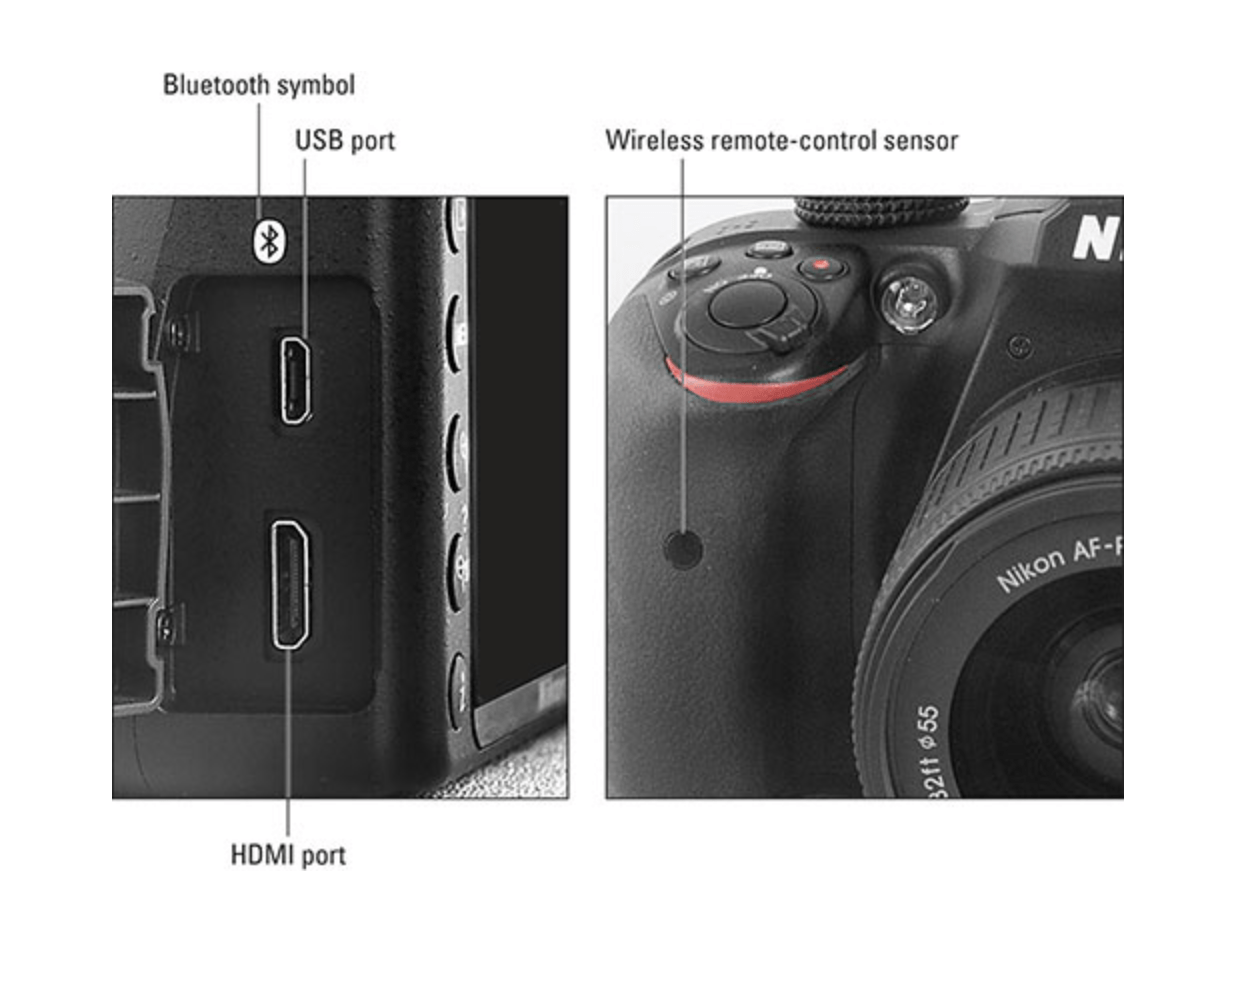
9. Some quick tips!
- Always check your settings before heading out to take pictures. The sunny-day settings you used yesterday won’t work well for tonight’s low light conditions.
- Make sure the lens is dust-free.
- If you’re going to be shooting in a quiet venue (a museum, at a wedding, etc.), go into the setup menu and turn off the beep that indicates when the image is in focus.
- In the setup menu, make sure Slot empty-release lock is set to Lock so you don’t take pictures when you don’t have an SD card in the camera.
- Always check your shutter speed, regardless of what exposure mode you’re in, to make sure it’s fast enough to handhold and avoid blurry pictures. I tend to aim for at least 1/125th sec when possible, but others have a steadier hand and can easily shoot at slower shutter speeds.
10. The Mode dial:
The Mode Dial is the most important control on the D3400. From here, you choose the camera’s exposure mode. Not only does your choice affect the way in which the camera exposes the image but also what other controls you have access to.
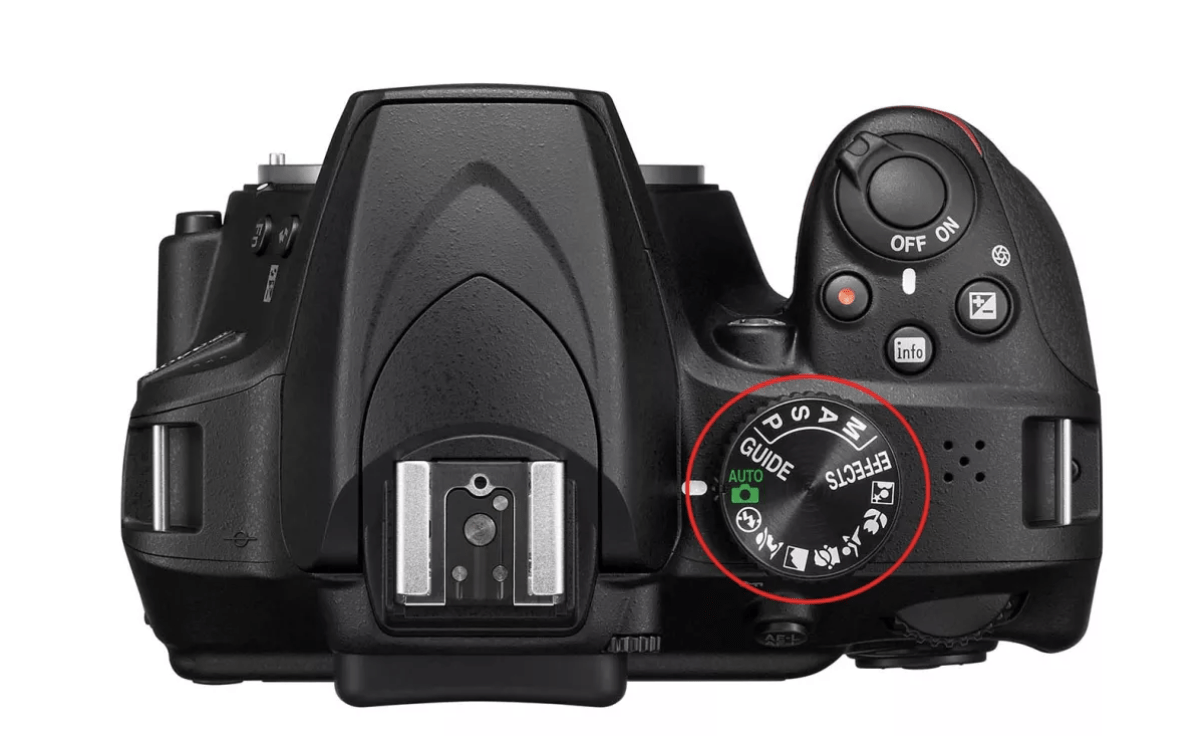
Mode Dial:
P = Program Auto. The camera chooses the shutter speed and aperture setting but you can change other parameters such as exposure compensation (to make the image lighter or darker). This is a good mode to start your exploration of the camera’s features.
S = Shutter Priority. You choose the shutter speed; the camera selects the appropriate aperture setting for what the camera considers a good exposure. This is the best option when you want to freeze action (fast shutter speed —1/200th sec or faster) or blur a moving subject like a waterfall (1/60th sec or slower). Importantly, the fastest shutter speed allowable when using the built-in flash or an external flash is 1/200 sec; this allows the flash and shutter to sync properly.
A = Aperture Priority. You choose the aperture (f-stop) setting; the camera selects the appropriate shutter speed for what the camera considers a good exposure. The aperture controls depth-of-field or how much of the picture — from near to far — appears in focus. A higher f-stop number, such as f/11, lets in less light but increases depth-of-field — the amount of the frame that’s in focus. A smaller number, such as f/2.8, does just the opposite.
M = Manual. You have full control over both shutter speed and aperture settings. Adjust one or both settings until the exposure gauge marker is in the center.
Guide. Choose the Guide mode, press the Menu button to get help with whatever you want to achieve. There are four options for different tasks: Shoot, View/delete, Retouch and Set up. Each section offers detailed instructions on how to accomplish a task manually or, in some cases, the camera automatically chooses the best settings for capturing a specific scene with a note about the specific setting(s) it’s using. It’s a solid learning tool for beginners.
Scene modes. The D3400 offers a half dozen scene modes, indicated by icons on the Mode Dial. Choose one that matches the type of photo you’re taking (Portrait, Landscape, Child, Sports, Close Up and Night Portrait) and the camera chooses all aspects of the image settings.
Auto/Auto Flash Off. The camera chooses what it considers the best settings for the scene; you have control over few advanced options.
Effects. If you want to get creative (or a little funky), check out the camera’s 10 special effects, such as Super Vivid, Photo Illustration and more.
More Controls:
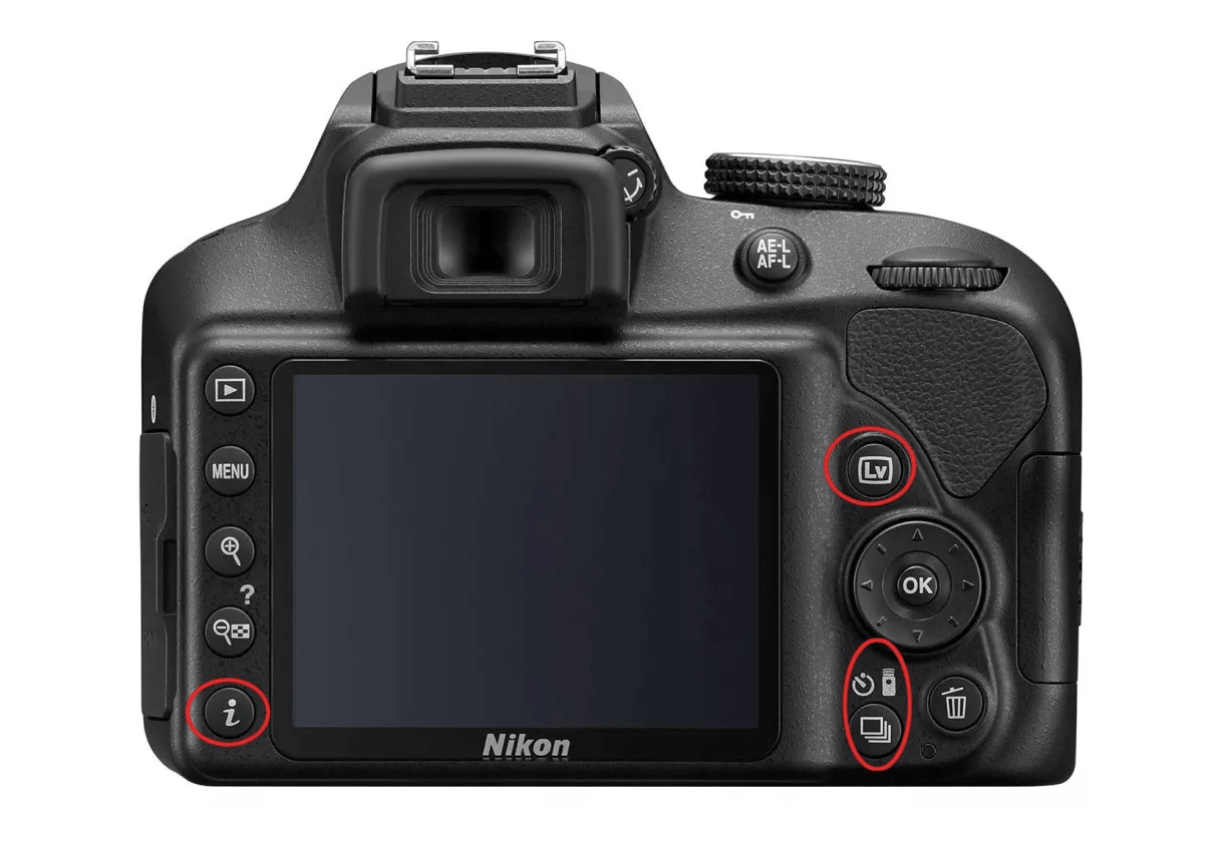
Lower left: Info button, which allows you to access and adjust most-often-used settings without going into the Menu system.
Upper right: Lv (Live View) button; flips up the mirror so you can view the scene via the LCD. Also used for capturing video.
Lower right: Release mode button. Here’s where you access self-timer and remote options, along with setting single or continuous shooting modes.
Explore More
You now have some basic information about the camera. Want more? Check out this list of items you can request from the library today!
The Ultimate Nikon Photography Guide
Nikon Photography The Complete Manual
LinkedIn Learning
And! Don't forget the many camera and photography courses available to you on LinkedIn Learning! Just click here, enter your card and pin number, then use the search box to find the course that's just right for you! I searched for "Nikon D3400" and found many great courses.
Links to the Nikon D3400 User Manual, opens a new window and Reference Manual, opens a new window!
That's all folks!



Add a comment to: Nikon D3400 – The Basics