
 Steps to Burn a DVD Using DVDStyler
- Start the DVDStyler program by clicking on the DVDStyler icon on your computer screen.

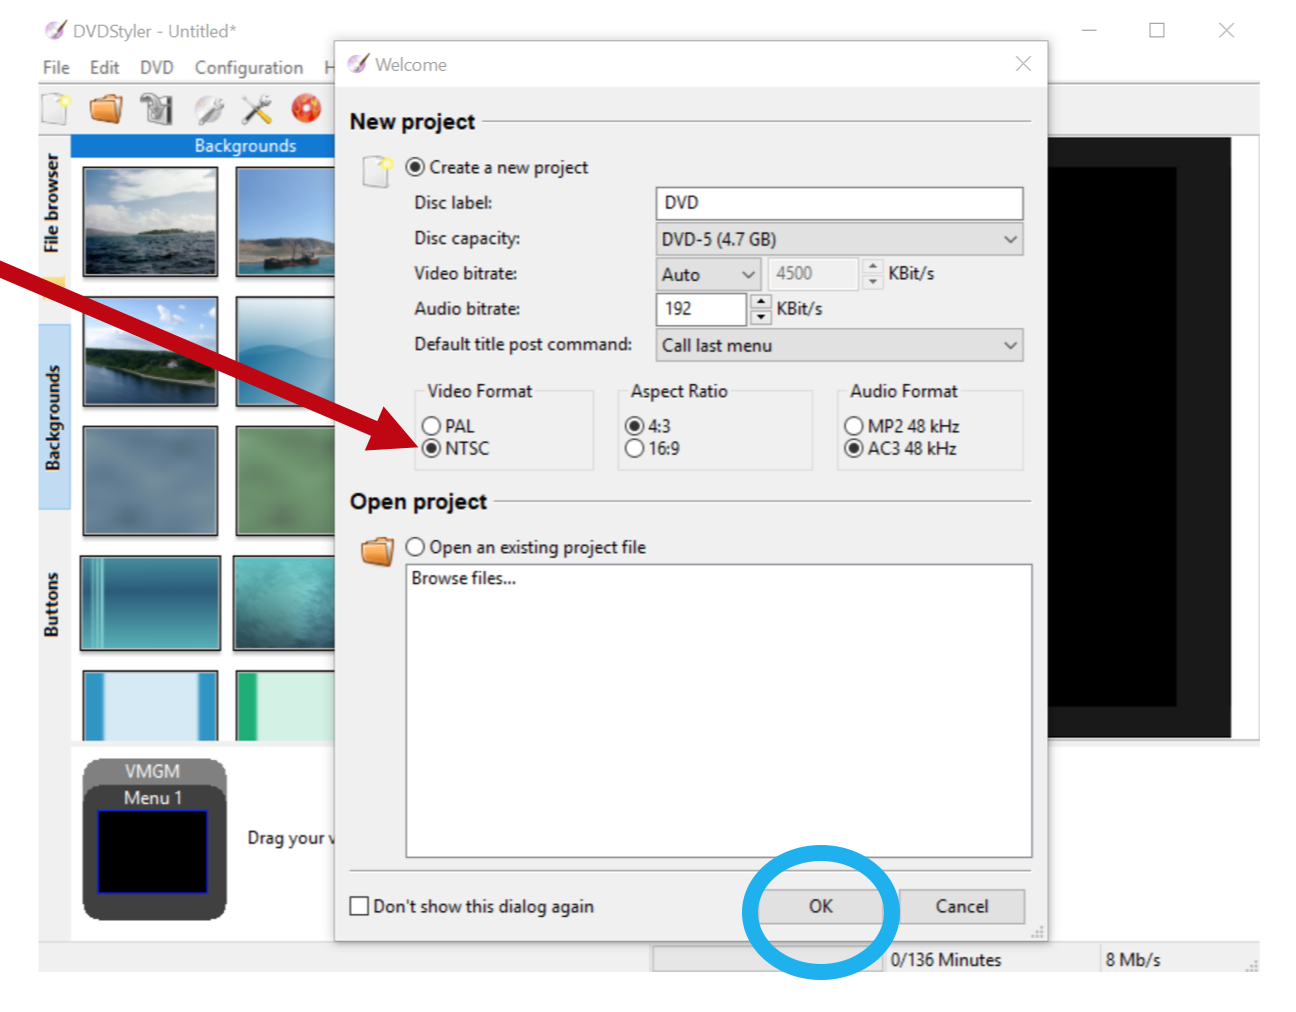
- The "New project" menu screen will open. The only setting you will want to change is the “Video Format” to NTSC. Then click on the “OK" button.
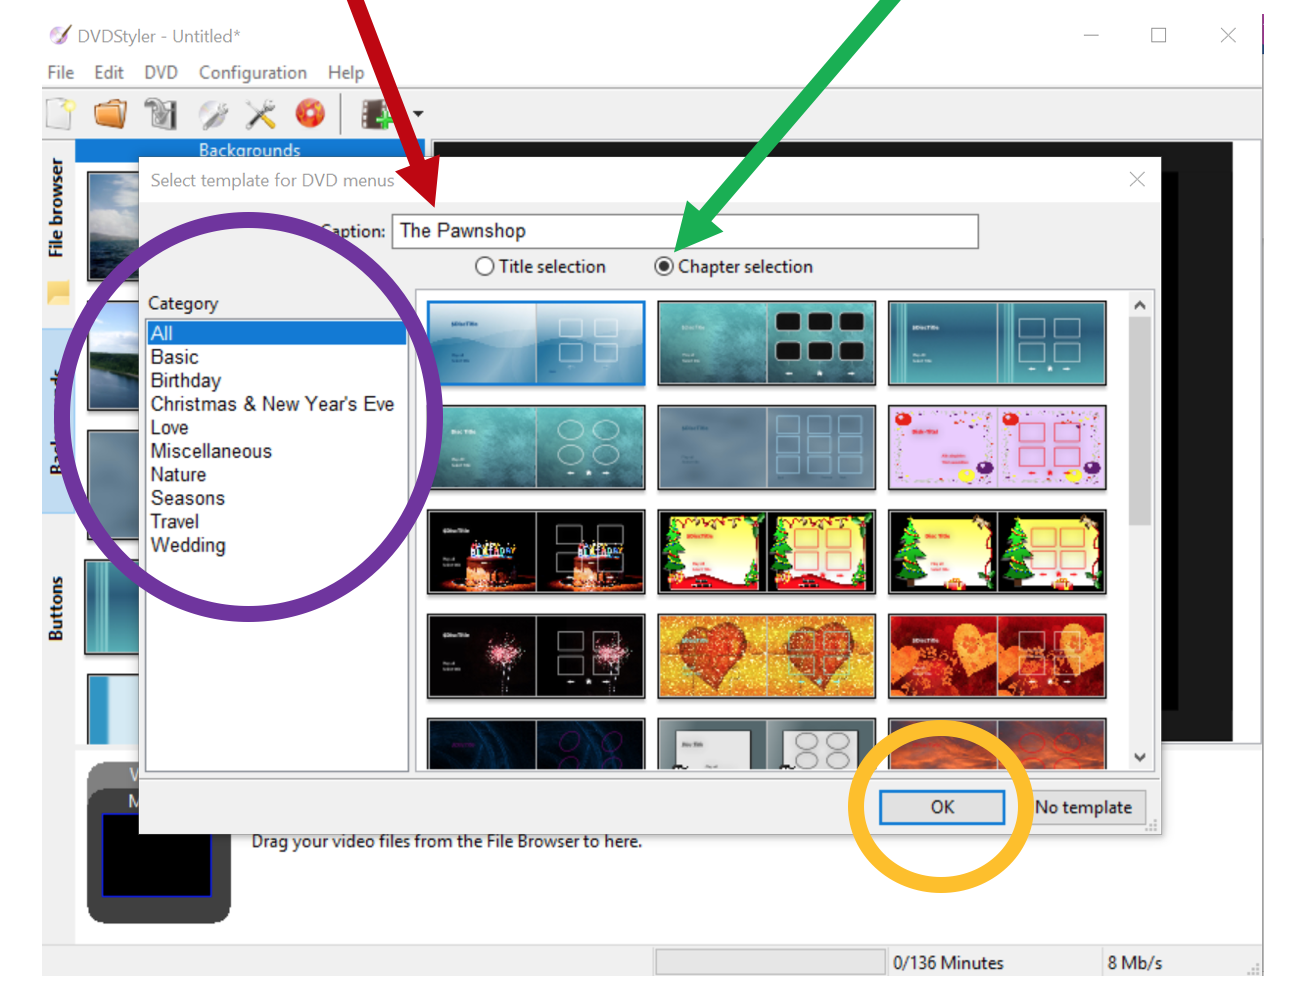
3. After clicking on OK you will get the "Select template for DVD menus" screen. Here you will select a menu and give your video project a title. Be sure to also select the “Chapter selection” button. Once done, click the “OK" button.
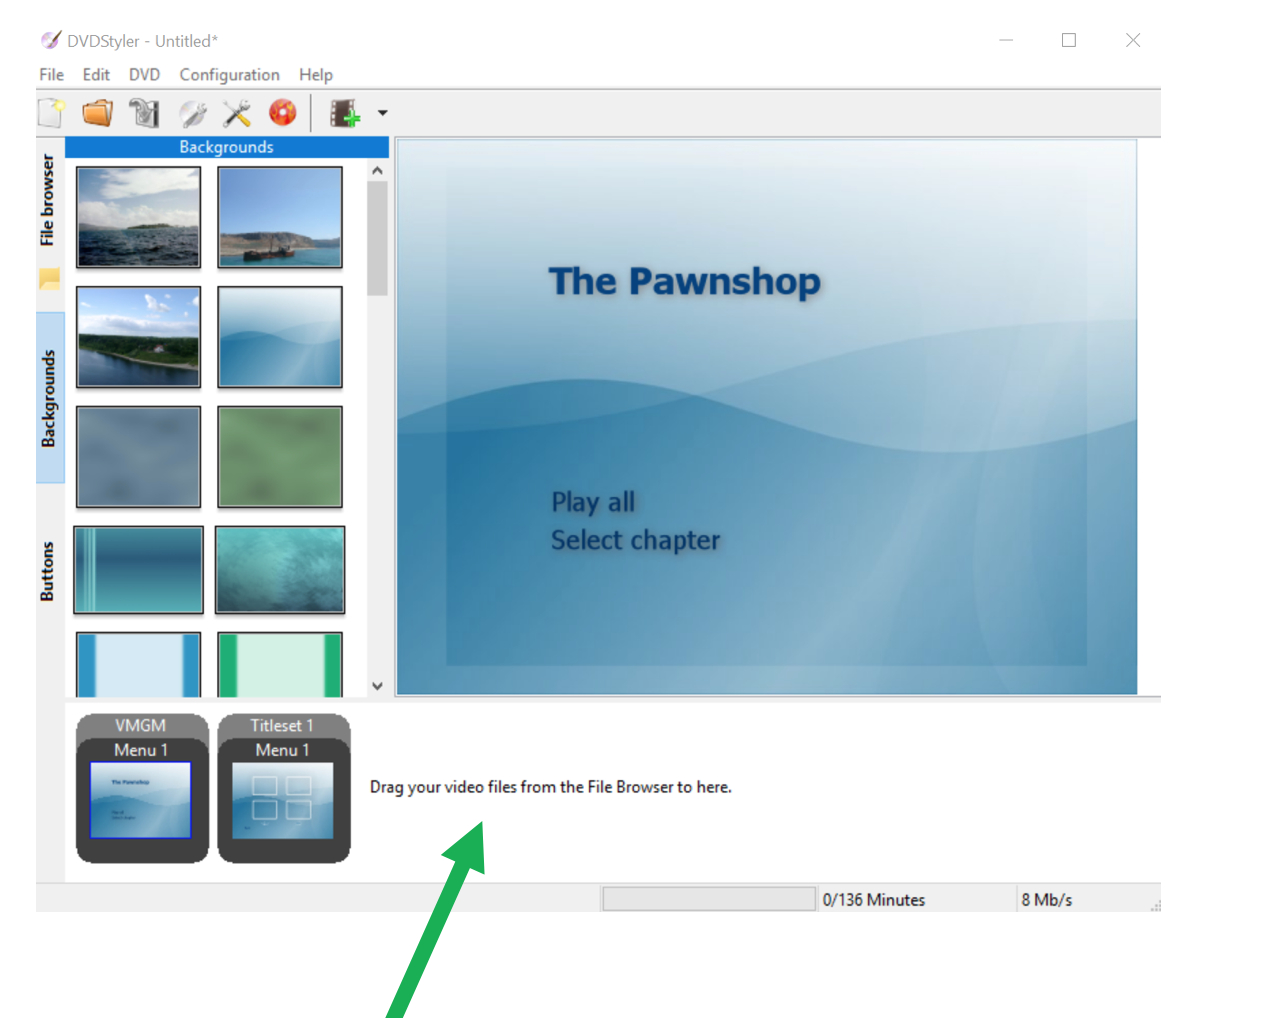
4. Now you can drag and drop your MP4 video file in the DVDStyler timeline. That’s the area where it says, “Drag your video files from the File Browse to here.” If you don’t like dragging and dropping files you can also right-click in the timeline and search for your file on the computer or attached storage device such as a flash drive.
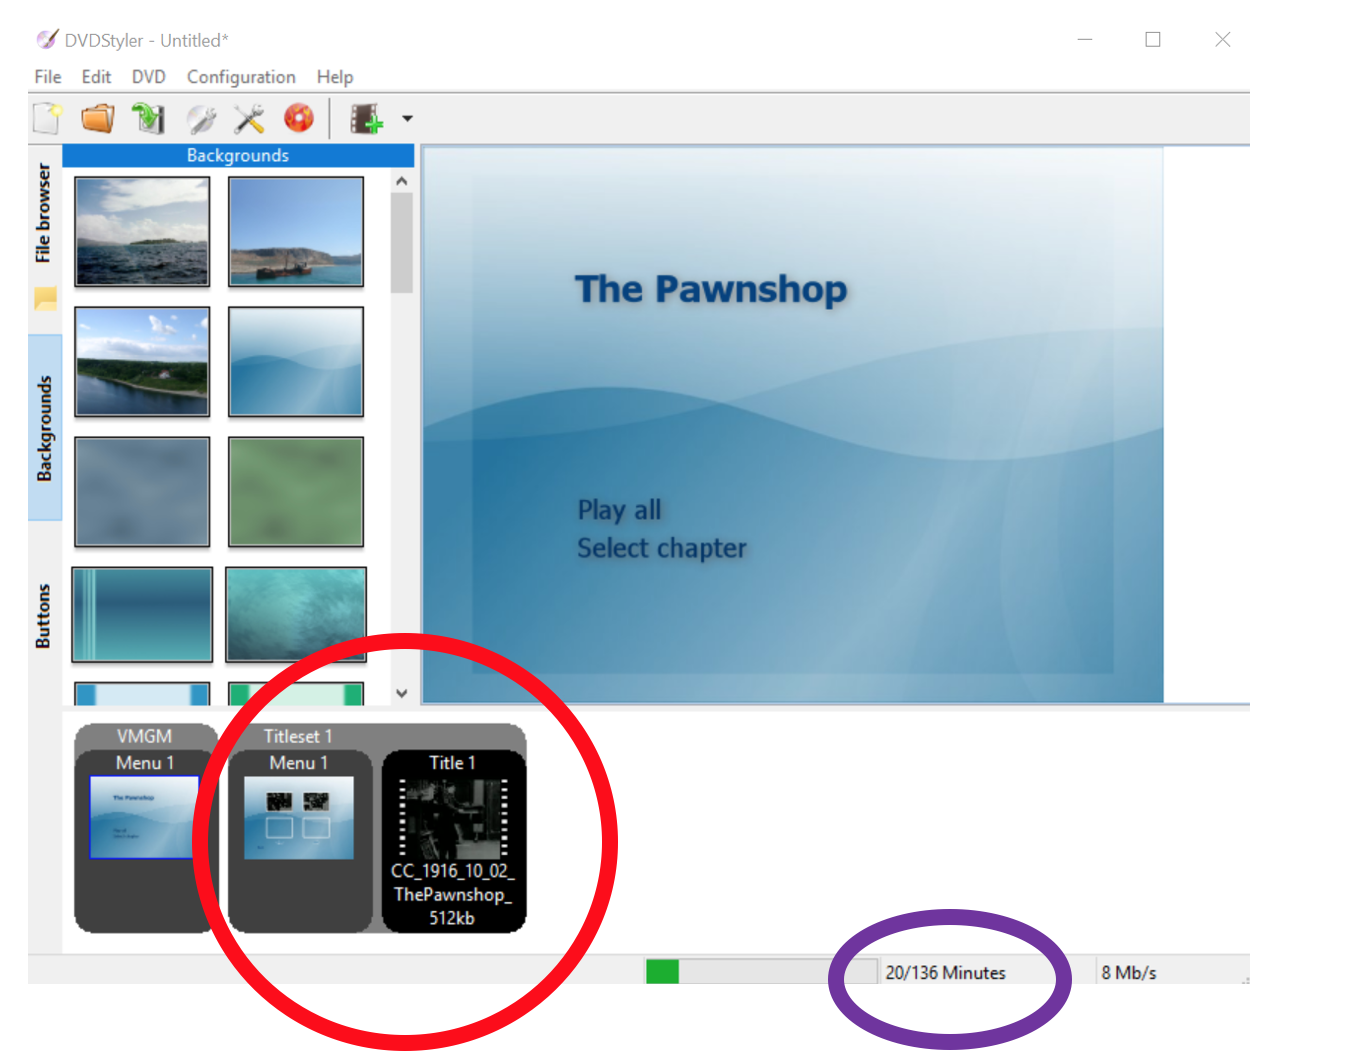
5. Below is an image of the screen after my MP4 video file was dropped into the DVDStyler timeline. Note that to the left of my video file I can see what the chapter menu will look like? Only two of the four chapter boxes are filled because my video is only 20 minutes long, which is noted at the bottom of this image. Tip: 1 menu box = 10 minutes of film.
6. You are now ready to burn your movie to a DVD disc. If your computer has a CD/DVD drive, use that. Otherwise, you will need an external CD/DVD drive (pictured below). For this tutorial, we are using an external CD/DVD drive.
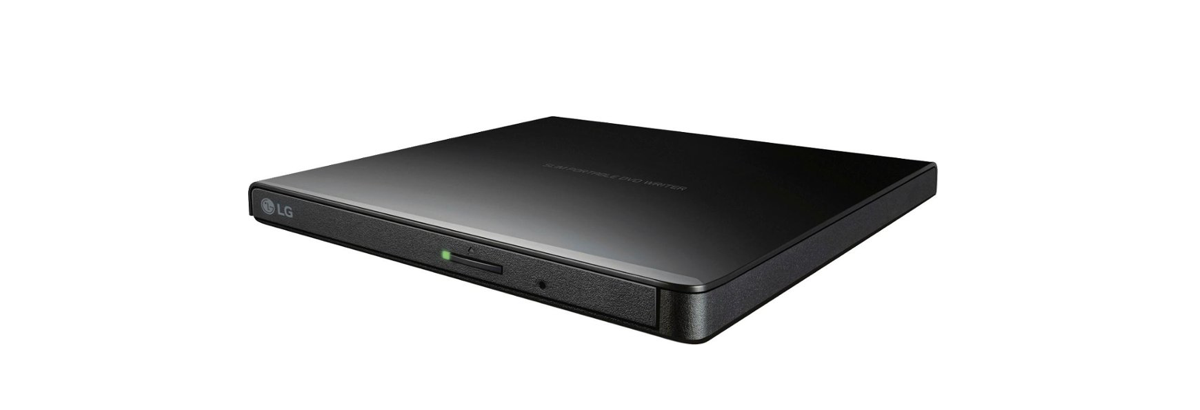
7. Plug the external CD/DVD drive into an available USB port on the computer. Open the CD/DVD drive and place a blank DVD inside, then close.
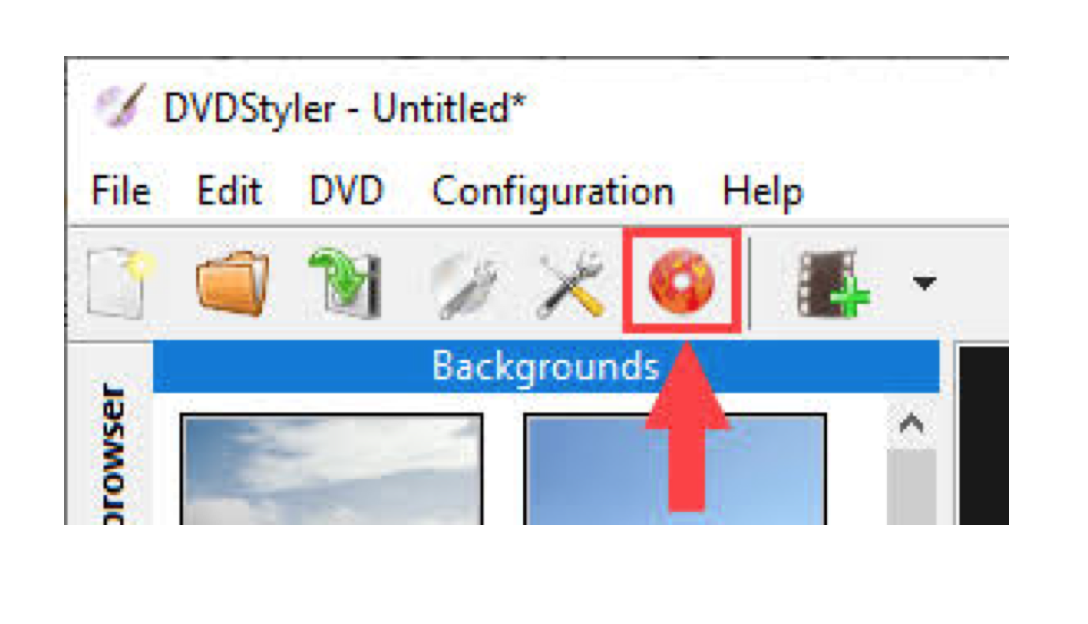
8. Now click on the DVDStyler orange burn icon shown in the picture below.
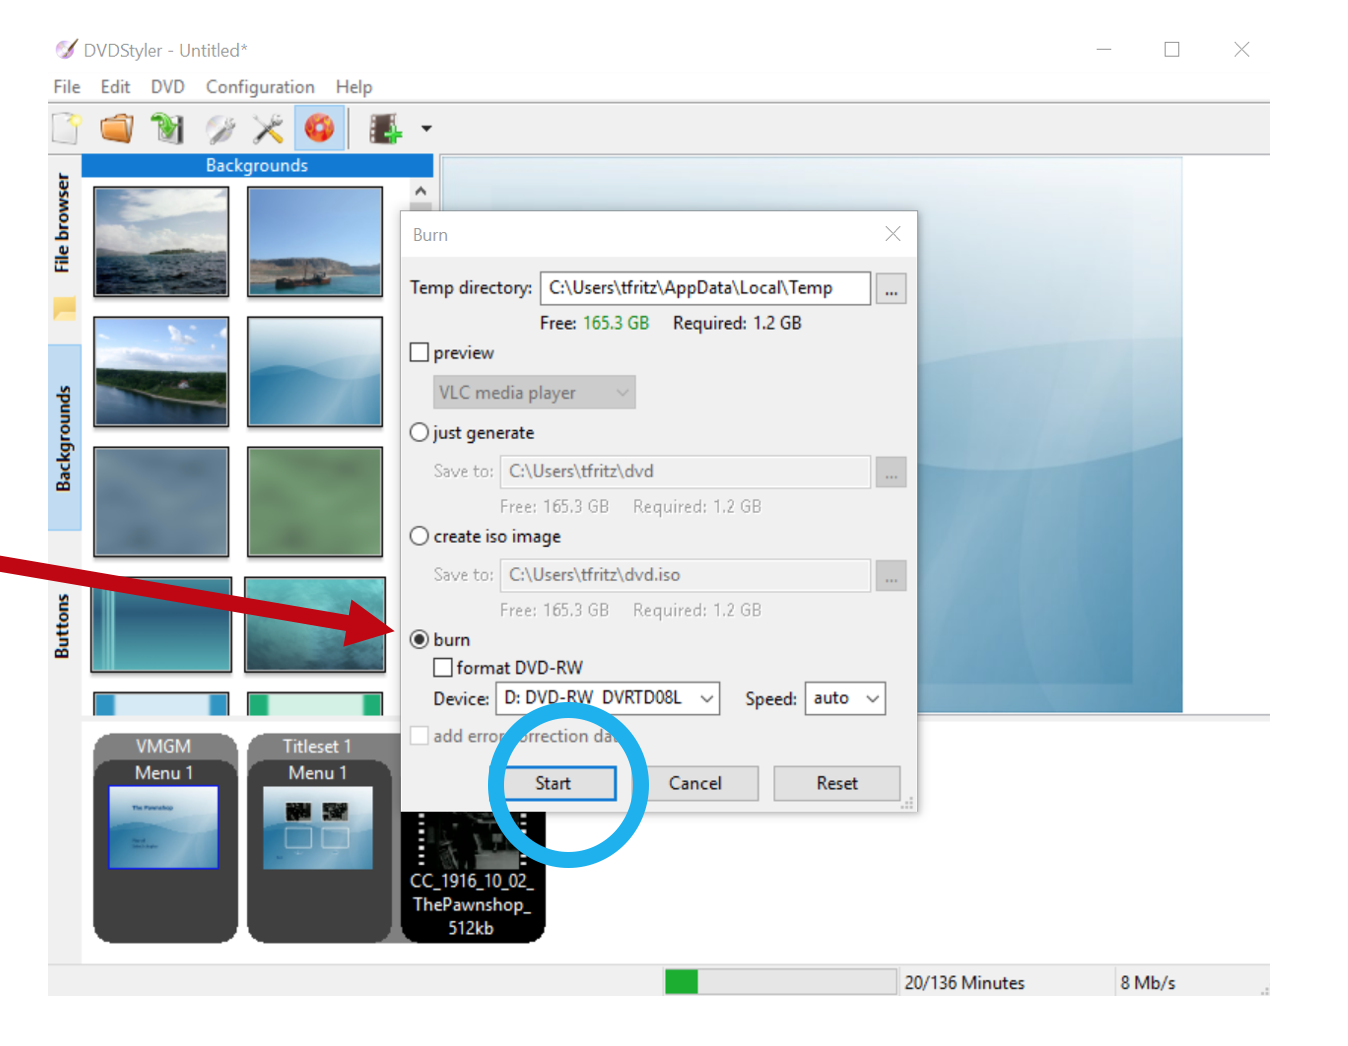
9. After clicking on the burn icon you will see the burn menu screen below pop up. The little burn button will already be selected as long as the CD/DVD drive is plugged in. Now click the “Start.”
10. Once the burning process begins you will see a "Generate DVD" screen like the one below. The “Summary” area will show the progress of the burning process.
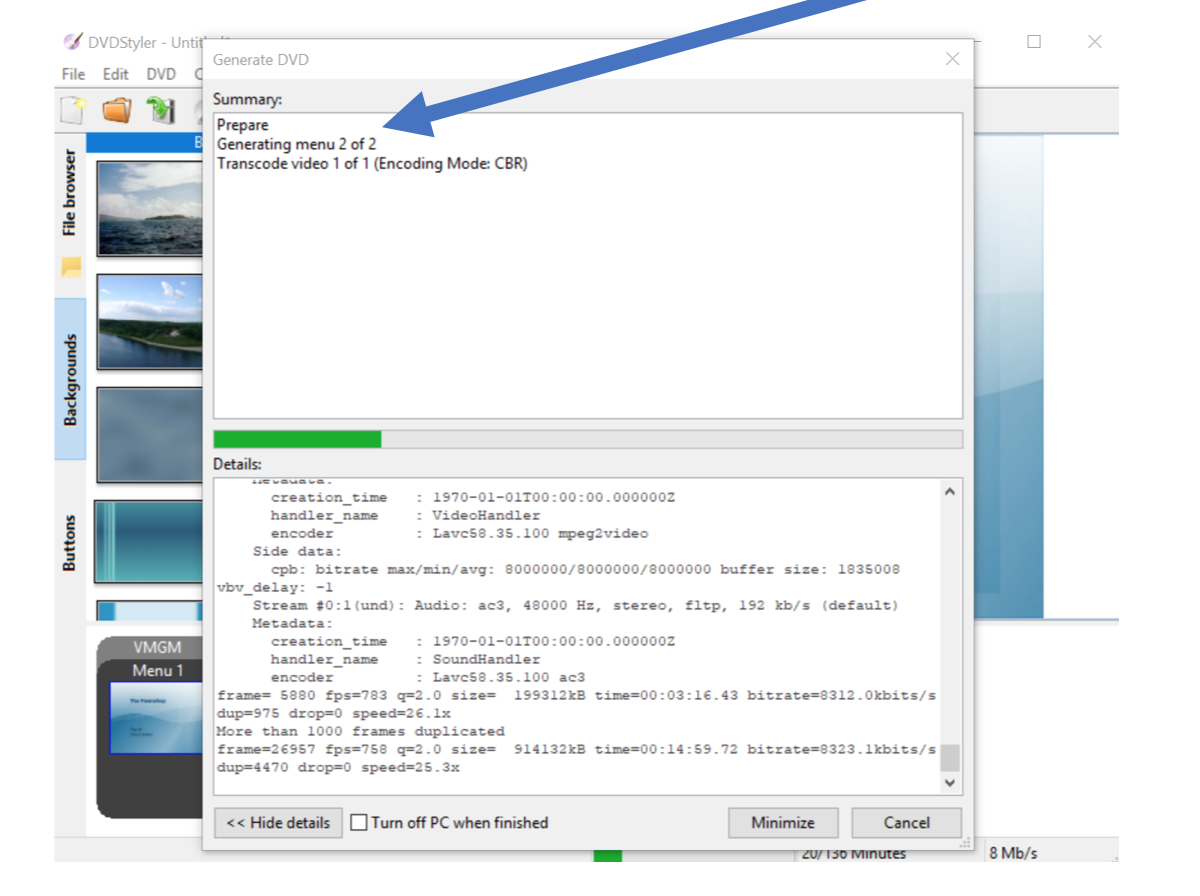
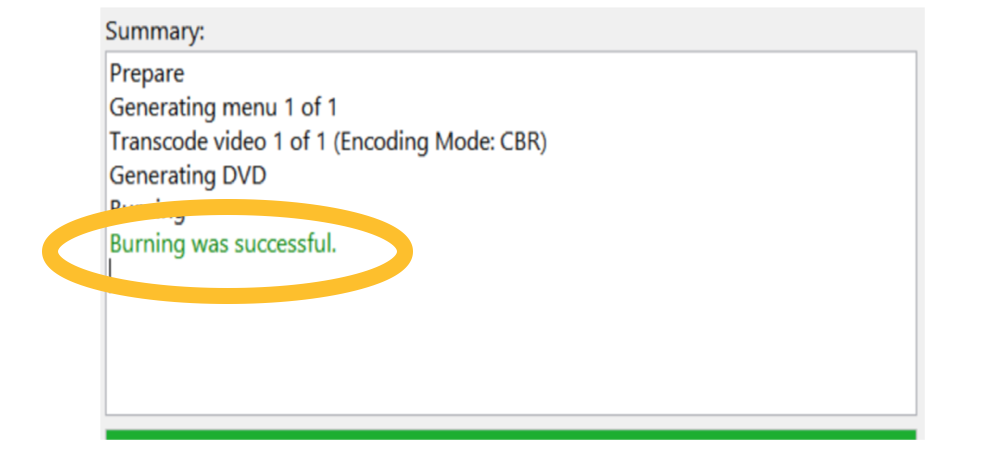
11. Once completed, “Burning was successful” will appear in the summary window of the Generate DVD screen. The external CD/DVD drive will kick out your completed DVD.
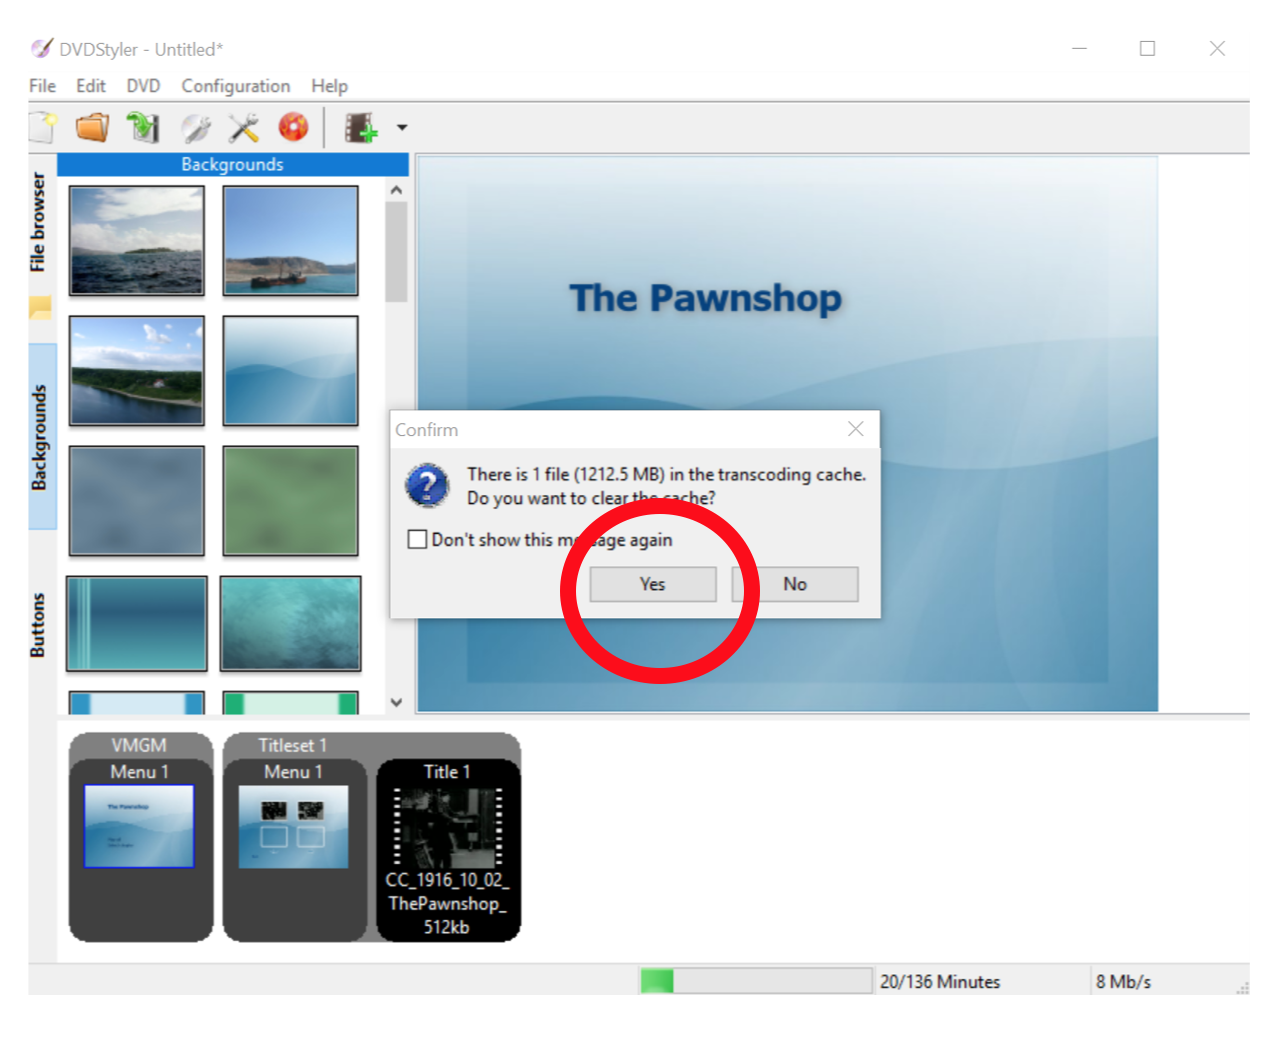
12. When you close out of DVDStyler you might get the pop up shown in the image below asking if you want to clear the cache. If so, click on the “Yes: button.
You're done!


Add a comment to: Burning a DVD with DVDStyler