
Do you still have old cassette recordings lying around? Want to ensure those recordings stay preserved for future generations? Then try out the Pyle Dual Cassette Deck at one of our Digital Media Stations and get those precious memories saved to digital!
NOTE: You will need to use recording software such as Audacity when digitizing your tapes. This device does not work with ION EZ Software.
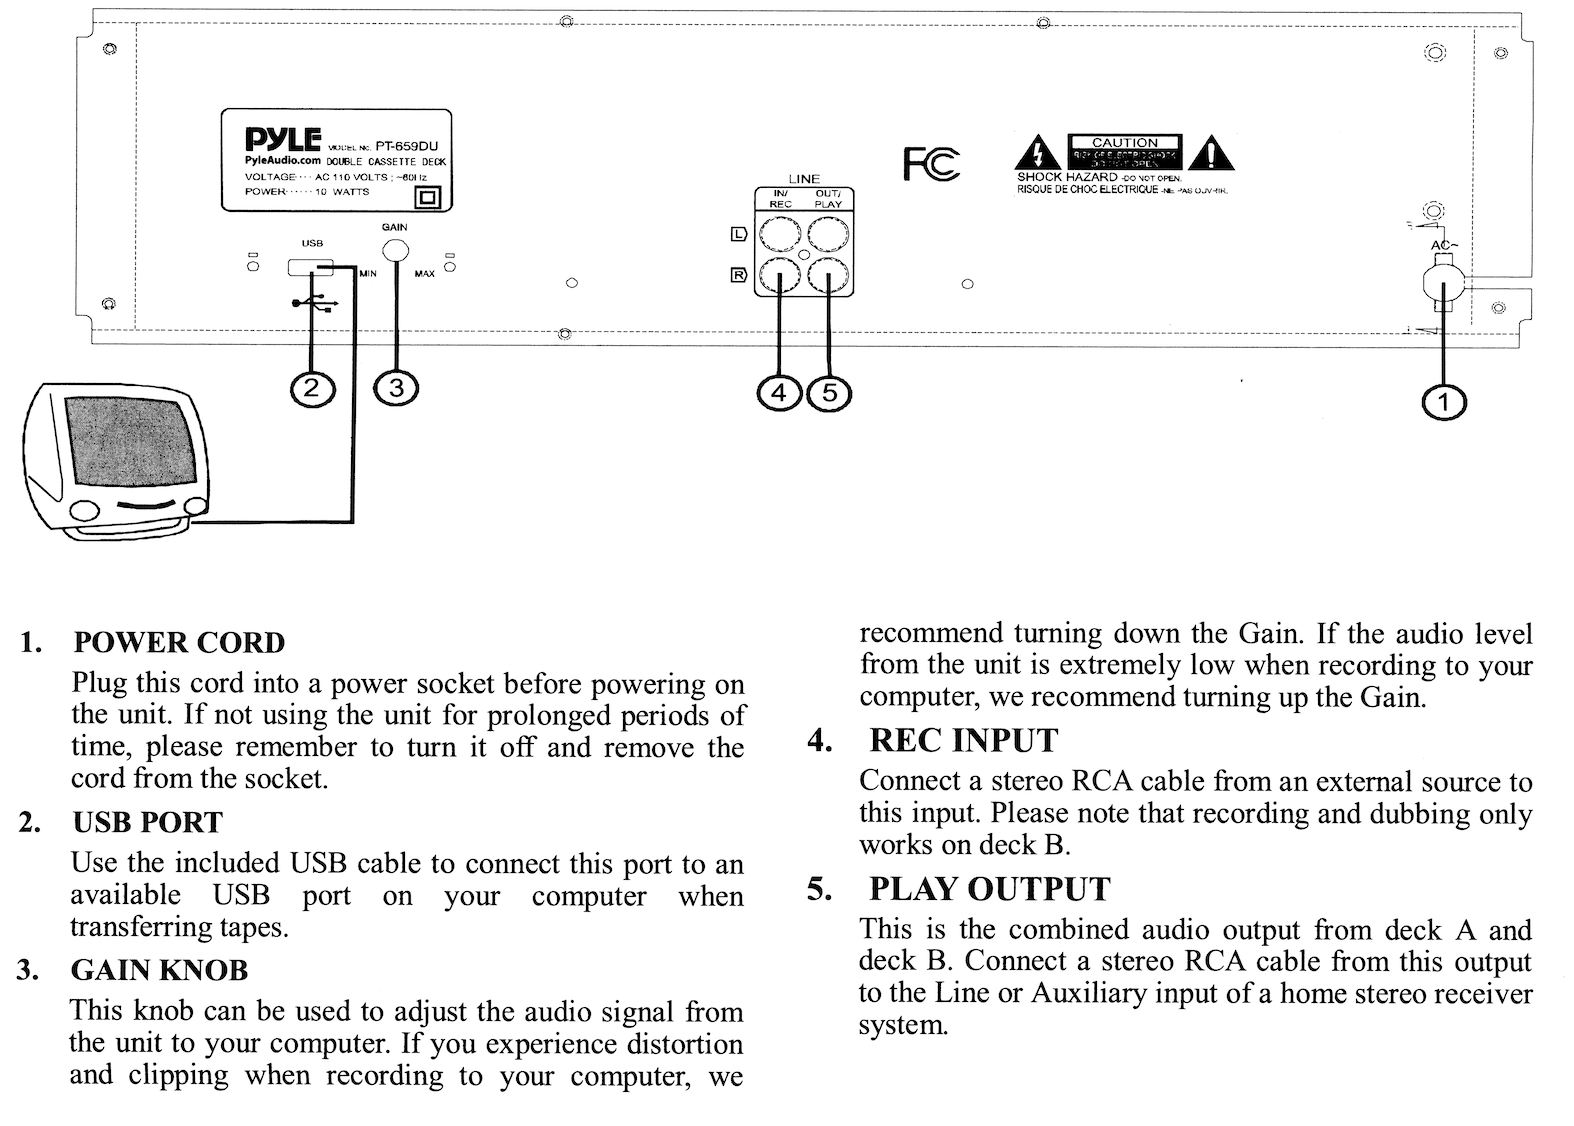
Let's take a look at this device!

Let's get started! Connect the cassette deck to your computer.
Option A: USB connection (most common)
- Plug the USB cable from the Pyle deck into your computer.
- Turn on the cassette deck.
- Your computer should recognize it automatically as an audio input device.
Option B: RCA cables
- Plug the red and white RCA cables into the deck’s LINE OUT.
- Plug the other end into your computer’s Line In (or headphone jack if Line In isn’t available).
- Turn on the deck.
Configure Audacity
- Open Audacity
- At the top toolbar, set:
-
Audio Host
-
Windows:
MME -
Mac:
Core Audio
-
-
Recording Device
-
USB users: select something like “USB Audio CODEC” or “Pyle USB Audio”
-
RCA users: select Line In
-
-
Recording Channels:
2 (Stereo)
-
Test your audio levels (important)
-
Insert the cassette tape.
-
Press Play on the cassette deck.
-
In Audacity, click View → Meter Toolbars → Recording Meter
-
You should see green bars moving.
-
Ideal peak levels: around -12 dB to -6 dB
-
If it’s hitting red, lower the input level:
-
Use the Input Volume slider in Audacity
-
Or adjust the deck’s output if it has a control
-
-
NOTE: If you see no movement, double-check the input device selection.
Record the cassette
- Rewind the cassette to the start.
- Press Pause on the cassette deck.
- In Audacity, click the Record (●) button.
- Immediately press Play on the cassette deck.
- Let the tape play all the way through one side.
- When finished, press Stop (■) in Audacity.
Repeat for Side B if needed.
NOTE: Now, you have two options. You can export your file and/or save your project. Exporting results in you getting an .MP3 or .WAV file. Saving the project saves your file as an Audacity project file (.aup3) which allows you to reopen the file i Audacity and continue editing.
Export audio file
- File → Export
- WAV (highest quality)
- MP3 (smaller, shareable)
- Name your file
- Click Export
Save your project
Save project (editable)
- File → Save Project → Save Project As
- Keeps everything editable later
Common problems & quick fixes
No sound recording
- Wrong input selected in Audacity
- Deck not powered on
- USB cable plugged in after Audacity opened → restart Audacity
Sound is distorted
- Input level too high → lower input slider
- Tape itself may be worn
One channel louder than the other
-
Old cassette issue - can fix later with Effect → Normalize

Add a comment to: Converting Tapes with the Pyle Dual Cassette Deck